

Microsoft has been busy releasing awesome new functionality to their cloud-native, modern identity solution, Azure Active Directory. Azure AD is the identity provider at the heart of all Microsoft 365 tenants. Microsoft is continually investing in improving the security posture and capabilities of the platform as evident by the roadmap. Within the past few weeks, there have been a number of new features either released as GA or public preview that really caught my eye.
In this four-part blog series, I’ll be sharing my favorite new releases to Azure AD, along with any notes from my deployment and demos/screenshots where feasible. I hope you enjoy and find the information helpful!
Enhanced Company Branding
Enhanced company branding is a major expansion to the existing branding capabilities already in Azure Active Directory. In the past, any Office 365, Microsoft 365 or Azure AD premium licensed tenant could be configured to display custom logo’s, backgrounds and text to users during the login process. In some cases, company branding in Azure Active Directory was/is required, such as during Windows Autopilot configuration. The overall idea of company branding is to provide users with visual feedback to indicate they are in the right place while performing authentication.
The previous options within company branding were limited and did not provide organizations with any ability to really hack away at the look and feel of the login process. The ability to truly customize the login process has expanded greatly with the latest public preview offering of Azure AD “enhanced company branding”.
The requirements to use enhanced company branding appear to be identical to the previous company branding requirements so anyone with a Microsoft 365 tenant and users licensed with Office 365, Microsoft 365 or Azure AD Premium licenses can take advantage of the new capabilities. As previously required, users need to supply their username first on the generic Microsoft 365 sign in page in order to be taken to their organizations custom company branded login experience.
If you want to skip right over this step and ensure users receive the organization branding immediately, you will need to ensure users are leveraging tenant specific app URL’s to access applications and services, for instance:
- https://outlook.office.com/mycompany.com
- https://passwordreset.microsoftonline.com/?whr=mycompany.com
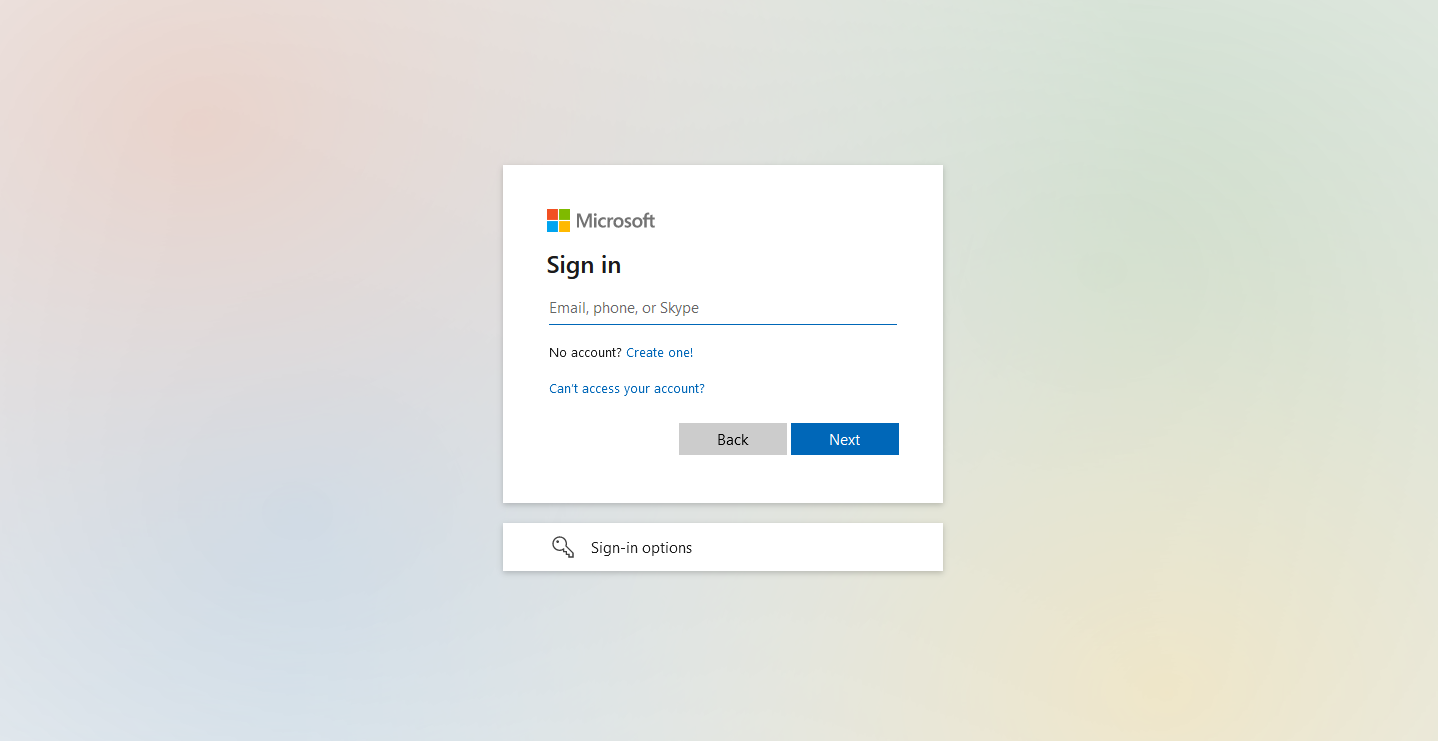
While the tenant specific app URL’s aren’t likely something your users will remember, these URL’s can be hardcoded in places like your organizations intranet site, browser bookmarks, etc. Prior to enhanced company branding, here’s what a typical company branded login would look like:

While helpful, there simply wasn’t much additional modification you could make. Displaying the company logo and possibly a background image or solid background color were the most common scenarios. Enhanced company branding introduces the following additional settings we can now modify:
- Page layout of the login screen
- Headers and Footers
- Custom CSS (here’s where your, or your graphic designers, can really get fancy with design)
- Custom URL’s and text for both the “Privacy & Cookies” link as well as the “Terms of Use” link.
- Ability to modify the text and URL of the self-service password reset link
After modifying some of these simple, additional settings in my demo tenant, here’s what my new sign in experience looks like:

As you can see, there is now a header logo in the upper left, a background image that’s shown in the traditional “partial-screen” layout, and custom links for terms of use and privacy in the lower right. With some time and effort on the custom CSS (which I did not have time to do here), you could really change the entire sign in experience to follow organization branding guidelines. Let’s walk through the admin portal experience together to see how we enable the new enhanced company branding settings.
We begin in the Entra admin console, https://entra.microsoft.com. For those that have not seen this console yet, this is the new entry point for administering all Entra related services moving forward. You’ll notice the Azure Active Directory portal options are built into the menu on the left. Click on the User Experiences menu item, then Company Branding.

Clicking the Edit button will take you through the configuration wizard. On the first page, you’ll see options for specifying your custom background, favicon, and a background color.
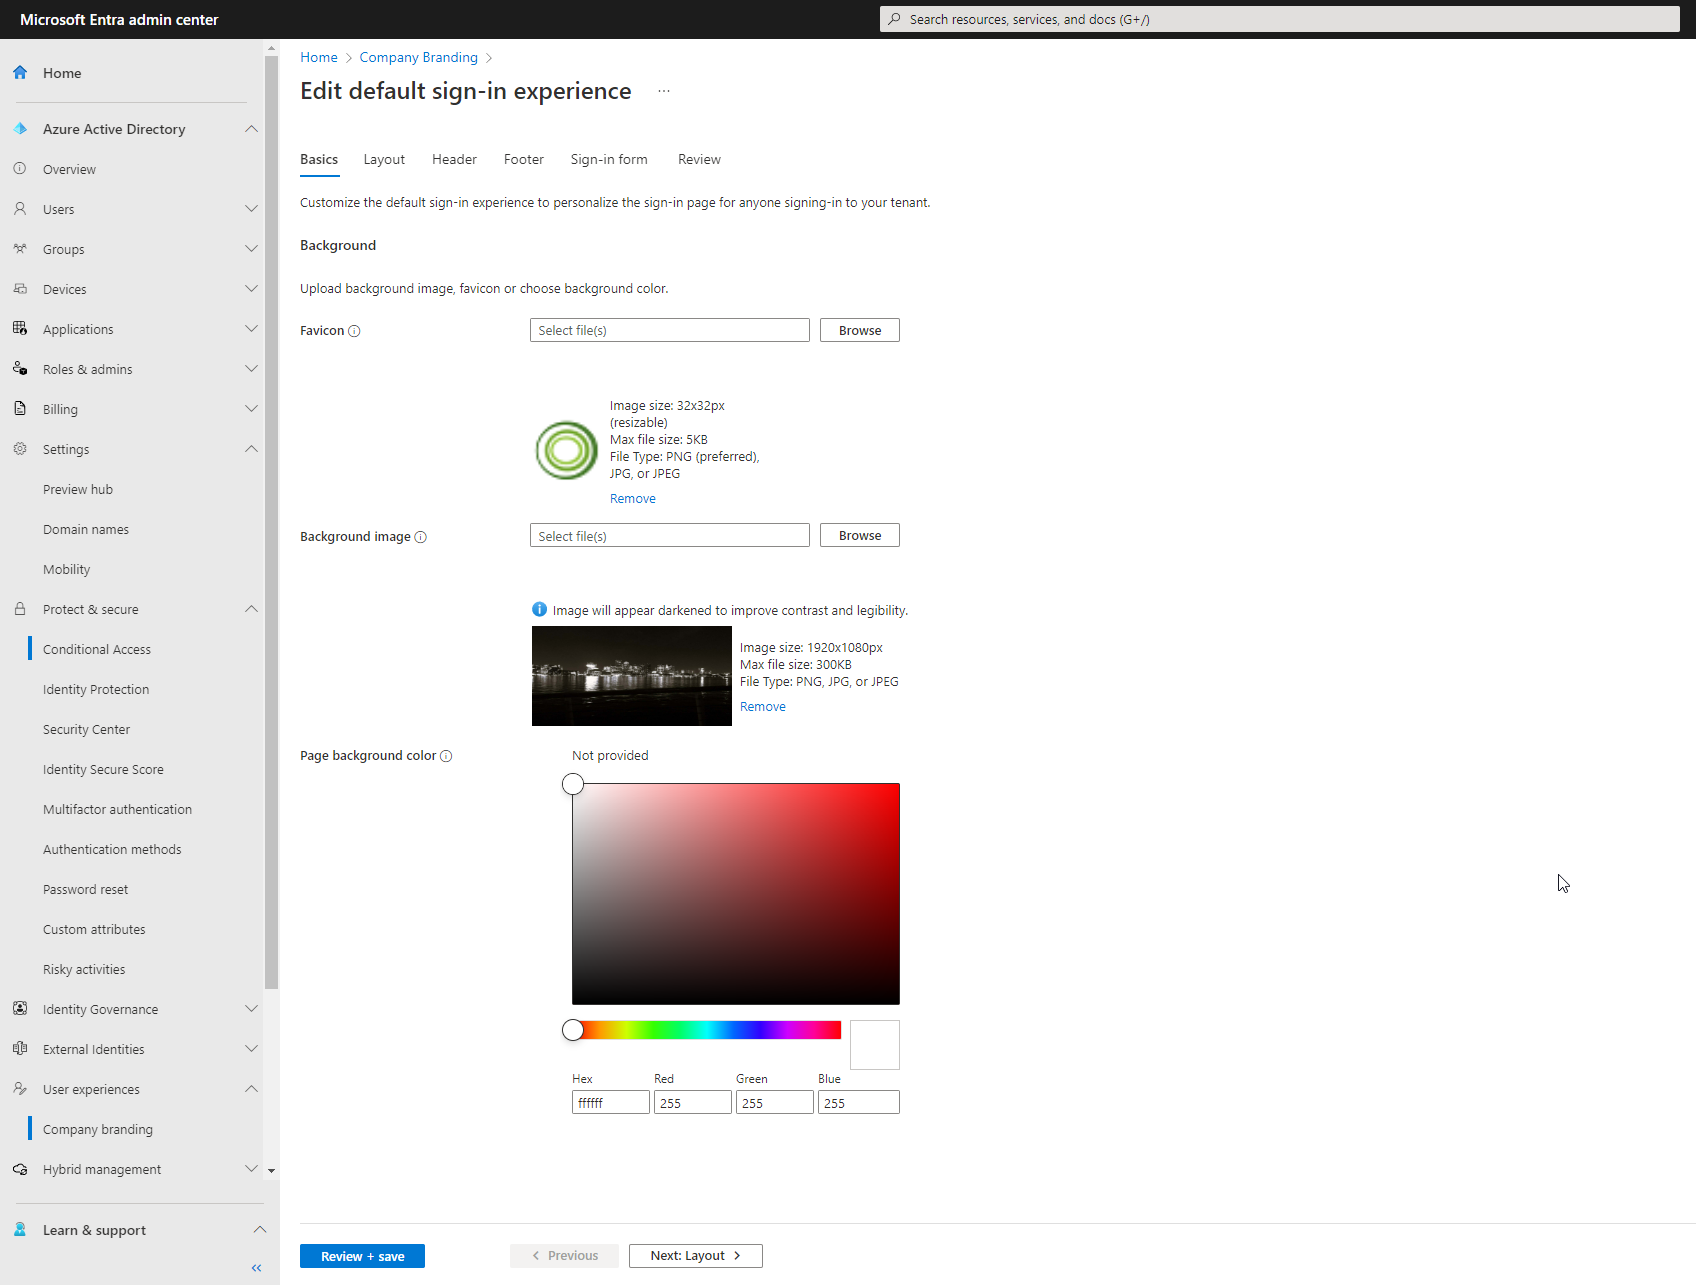
Click the Next: Layout > icon to navigate to the next screen of the wizard. This will land you on the topology page where you can select a template, decide whether to show the custom header and footer, and a supply a custom CSS file, if desired. Use the Microsoft provided CSS template as a starting point. One important note from this screen is that if you choose to leverage a custom background image for your login page, you will likely want the partial-screen background template option to ensure that your background image is always shown during the login process.

Click the Next: Header > icon to continue to the next page of the wizard. The header page only contains one option for customization, which is the header logo. Specify a custom image that meets the requirements (more on image requirements later) and continue on to the footer page.

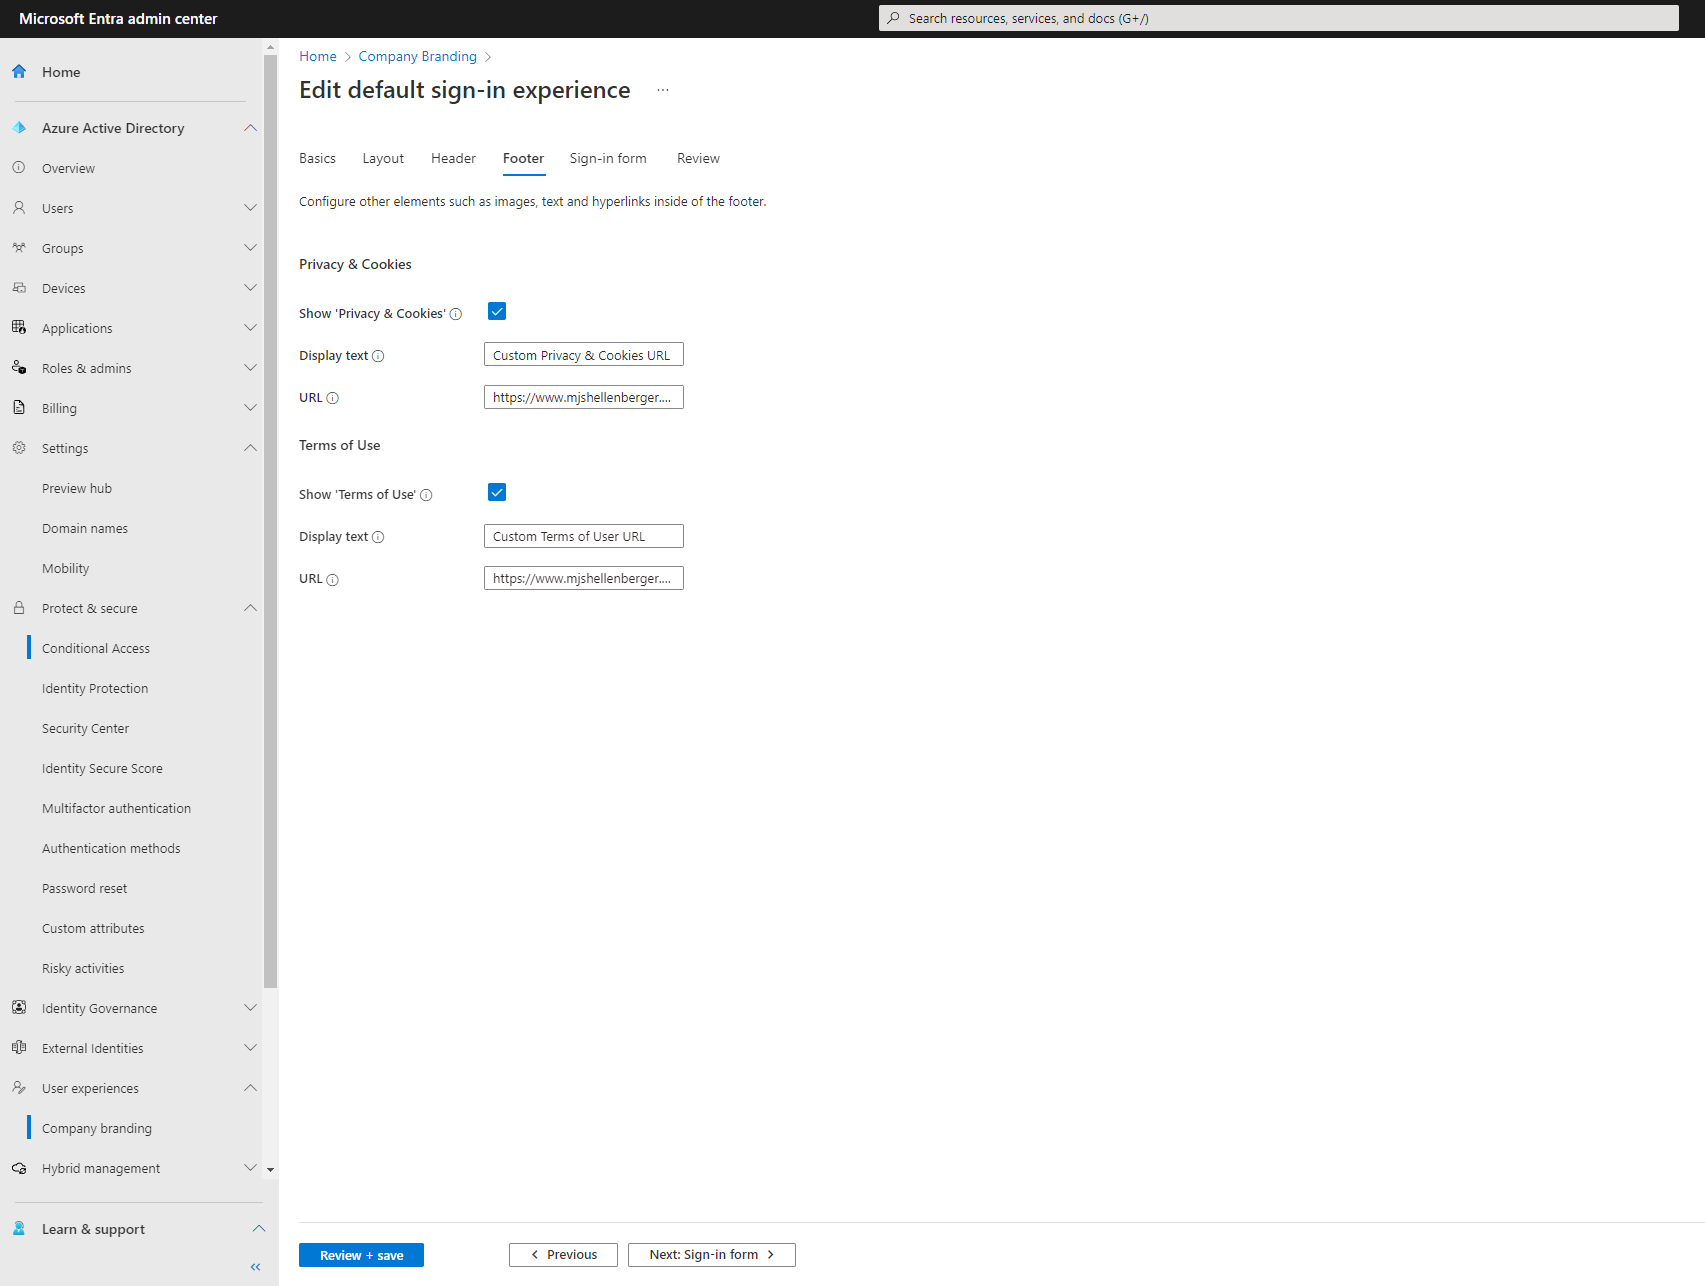
The footer page allows for the customization of the default “Privacy & Cookies” and “Terms of Use” links that show on the login page by default. You can choose to show/hide either or both links, as well as customize the text of the link and the destination URL. In both cases, it’s supported to set the link text and destination URL to anything you would like, so providing users with a shortcut to your organizations help desk or support portal is absolutely achievable. You wouldn’t have to use these links for T’s and C’s if you’d rather use the opportunity for more relevant links.
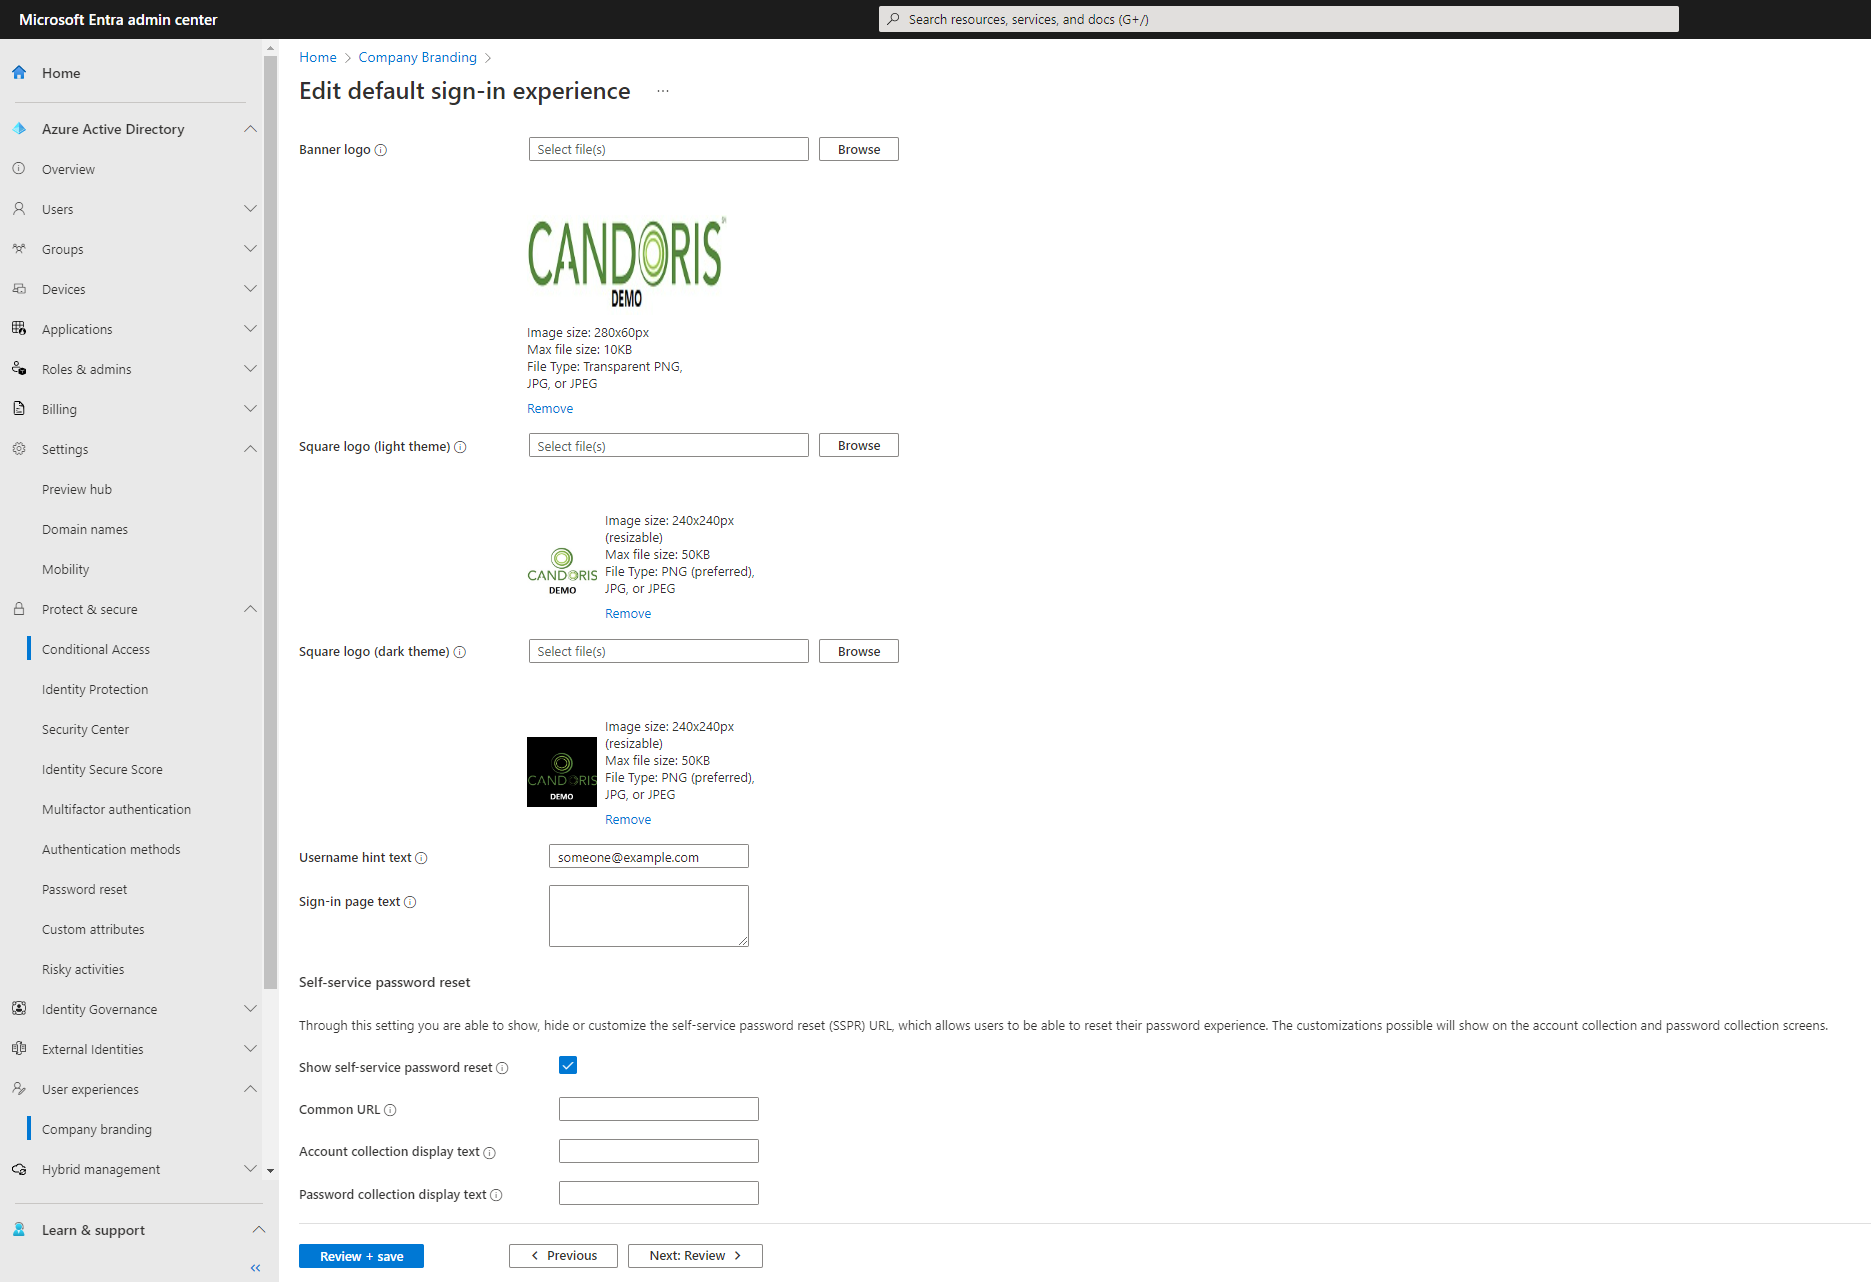
Click Next: Sign-in form > to continue to the last editable page of the wizard. On this page you’ll find the traditional company branding options such as logo’s, username hint text (highly discouraged from a security perspective), and sign-in page text. There is an option to show or hide the self-service password reset link, which has existed for some time, but something new here is the option to modify the link text and destination URL. If your organization leverages a third-party password reset tool for Active Directory, this option gives you a good opportunity to now link and redirect users to the solution instead of users trying to run through the Azure AD SSPR and receiving an error message since AAD SSPR isn’t enabled for your tenant.
Review your changes on the final page of the wizard and click Save. In my experience, you will need to give any changes 15-30 minutes to fully propogate and begin displaying for end users.
In conclusion, I’m a big fan of the enhancements here and only wish I had more CSS experience to further customize this, but it’s now on my list of things to play with in the future! I’m providing a table here of all the possible custom images you can specify along with the image requirements, as that seemed to be missing from the official docs article, currently. You can find these requirements within the configuration wizard as well.
Image requirements:
| Image | Max Image Size | Max File Size | Image Format |
|---|---|---|---|
| Favicon | 32x32px | 5KB | PNG, JPG or JPEG |
| Background image | 1920x1080px | 300KB | PNG, JPG, or JPEG |
| Header Logo | 280x60px | 10KB | PNG, JPG, or JPEG |
| Banner logo | 280x60px | 10KB | Transparent PNG, JPG, or JPEG |
| Square logo (light theme) | 240x240px | 50KB | PNG, JPG, or JPEG |
| Square logo (dark theme) | 240x240px | 50KB | PNG, JPG, or JPEG |
Are you finding the content on my site particularly helpful? Please consider donating to help me offset the costs of maintaining this site. Your support is greatly appreciated!


Leave a comment