

Series Overview
In this series, I will cover multiple options for deploying Windows 11 upgrades in the enterprise leveraging native Microsoft tooling. While each part will serve as a step-by-step guide for leveraging different Microsoft solutions to deploy the upgrade, I assume you’ve already taken the necessary steps to thoroughly plan and pilot Windows 11 in your environment. While Microsoft has made the transition from Windows 10 to Windows 11 the easiest operating system upgrade yet, it’s still prudent to perform application compatibility testing, driver testing, user adoption awareness training, etc. to ensure a smooth, rollout with minimal impact to the business.
Part II – Microsoft Configuration Manager Deployment (Software Updates or Windows Servicing)
If your organization has not yet taken steps to migrate towards modern, cloud-based device management with Microsoft Intune, the best, and only, Microsoft solution for full lifecycle Windows device management is Configuration Manager. There are three options for deploying an in-place Windows 11 upgrade to Windows 10 clients. The first method (Option 1) is the use of a task sequence to deliver the operating system upgrade package and was covered in Part I of my blog series. The second method (Option 2) is to leverage Software Updates in Configuration Manager and the third method (Option 3) uses Windows Servicing in Configuration Manager. Both of the latter methods (Options 2 & 3) I will cover in this post, Part II of the series.
Note: While there are ways to perform a “wipe and reload” style migration to Windows 11, it is a more difficult and less successful method than the in-place upgrade. The in-place upgrade used to be frowned upon in the enterprise, but Microsoft has made major changes to how the in-place Windows upgrade works and it is now the simplest and most effective way to upgrade devices. I will only cover methodologies for performing in-place upgrades to Windows 11 in this series.
- Series Overview
- Part II – Microsoft Configuration Manager Deployment (Software Updates or Windows Servicing)
- Preparing Configuration Manager for Windows 11 Upgrade Deployment using Windows Servicing
- Validating Windows 10 Client Upgrade Readiness (Using Built-In Tooling)
- Deploying Windows 11 23H2 Update via Microsoft Configuration Manager – Option 2
- Deploying Windows 11 23H2 Update via Microsoft Configuration Manager – Option 3
Preparing Configuration Manager for Windows 11 Upgrade Deployment using Windows Servicing
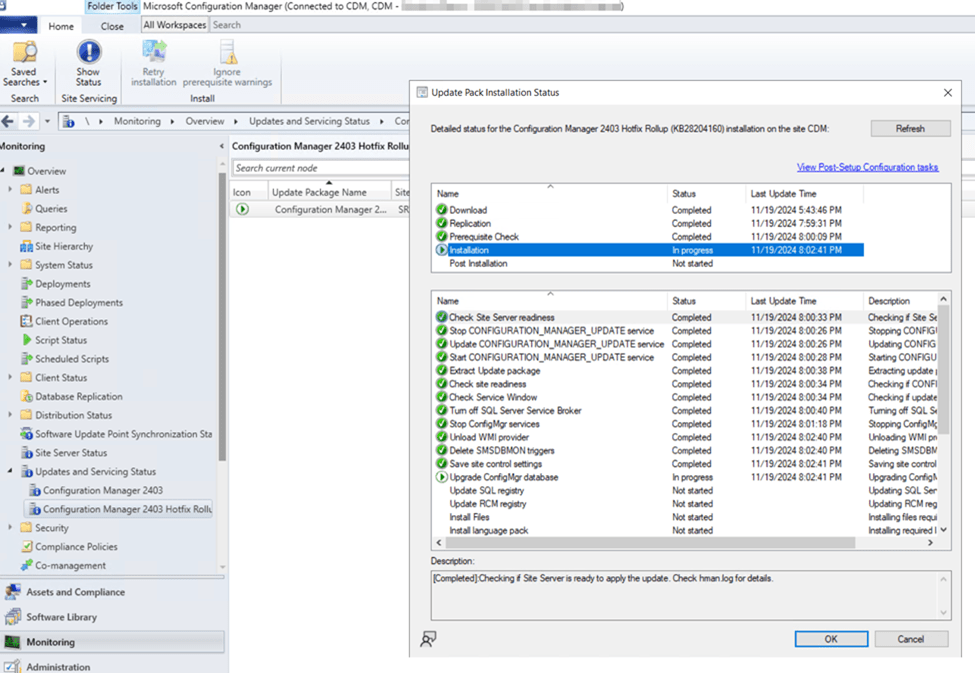
First, ensure your Configuration Manager site is up to date with available updates and hotfixes. As of the posting of this article, 2403 with Hotfix Rollup KB28204160 is the latest. To apply site updates, navigate to Administration > Updates and Servicing.
In addition to ensuring you are on a recent build of Microsoft Configuration Manager, we will need to ensure the Software Update Point feature is deployed, configured and in a healthy state. This article will assume you have already deployed the Software Update Point role in your site. If you do not have the Software Update Point role deployed, do that first before proceeding.
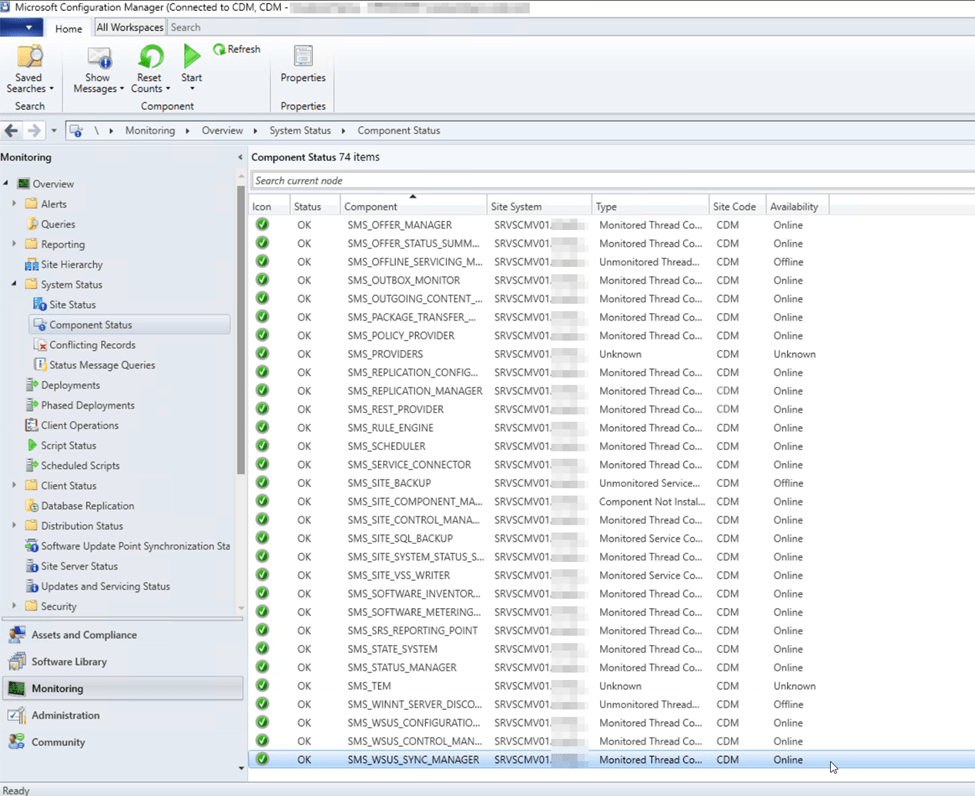
To check the Software Update Point synchronization logs, open the Configuration Manager console, then navigate to Monitoring > System Status > Component Status. Sort the Component column by clicking on the header, then scroll to the SMS_WSUS_SYNC_MANAGER log.
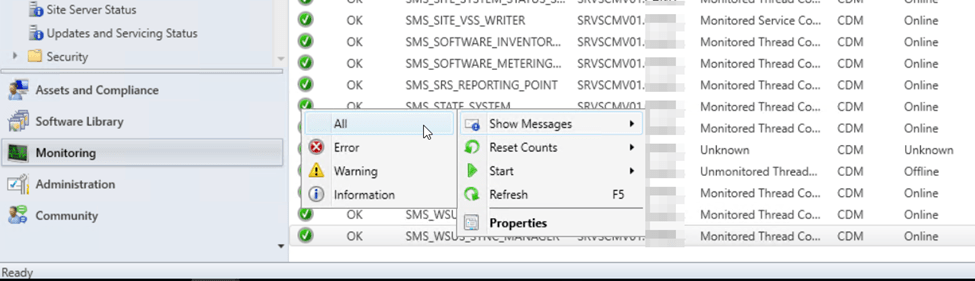
Right-click the log file, then select Show Messages > All
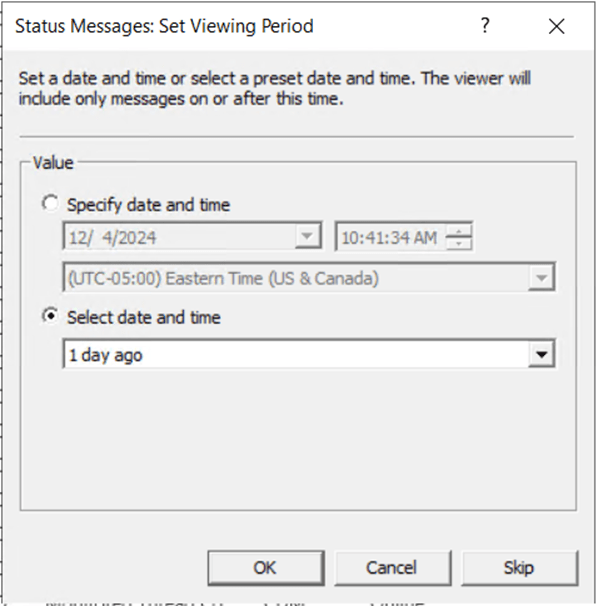
You can leave the viewing period to the default of 1 day ago. Click OK.
The Configuration Manager Status Message Viewer will open displaying the WSUS Sync Manager log entries. Search for the most recent WSUS Synchronization and validate there are no errors or warnings. If there are, address these issues before continuing.

After confirming that the Software Update Point is synchronizing with Microsoft Update Servers error-free, we’ll need verify the Service Connection Point role is properly deployed in the site. This article will assume you have already deployed the Service Connection Point role to a site system. If you do not have the Service Connection Point role deployed, do that first before proceeding.
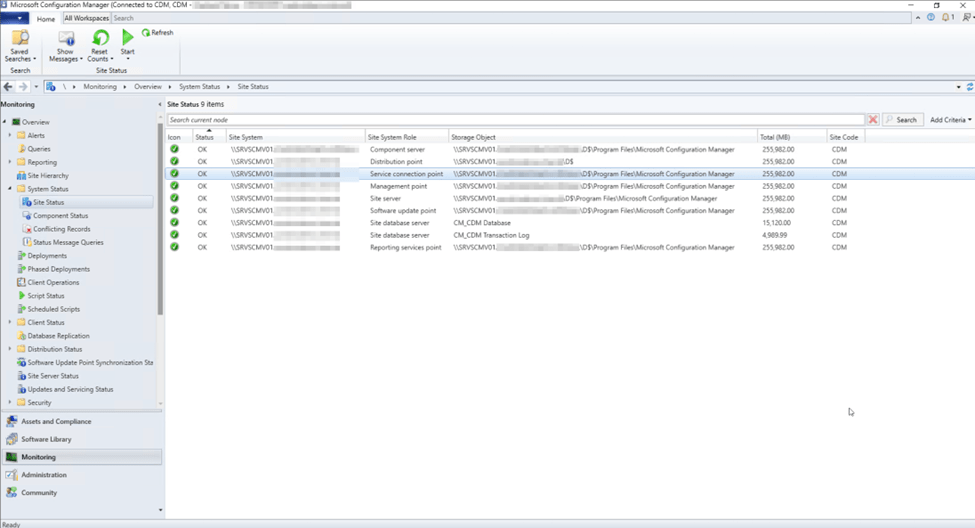
To check the status of the Service Connection Point, open the Configuration Manager console, then navigate to Monitoring > System Status > Site Status. Look for the Service Connection Point role and validate the health status is green. If the health status is not green, proceed to open the Configuration Manager Status Message Viewer and review the most recent entries for troubleshooting.
Now we will configure the site prerequisites for delivering the Windows 11 23H2 update through Configuration Manager.
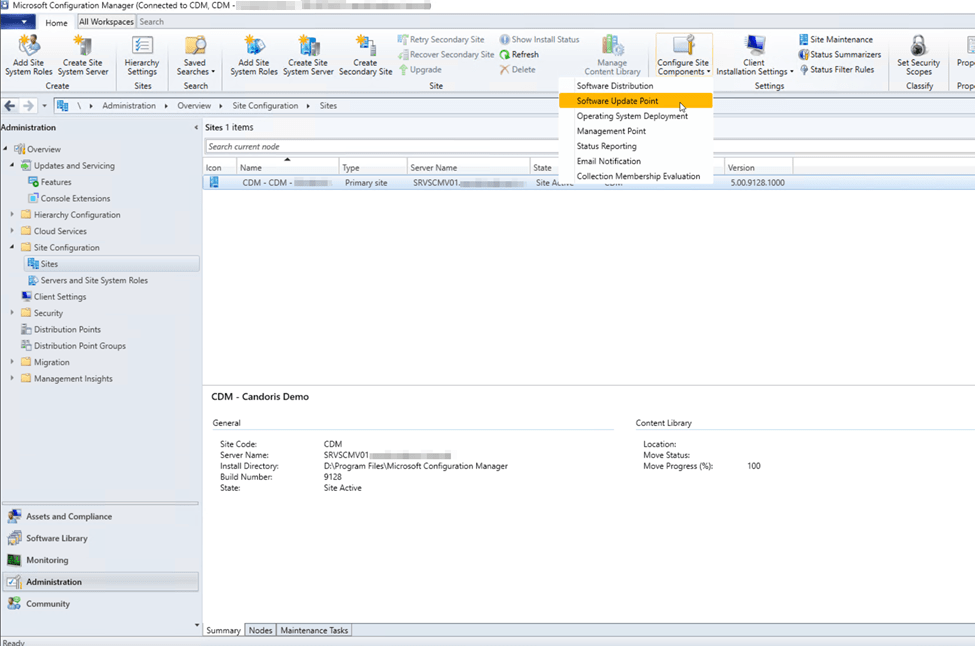
First, we will configure the Software Update Point to synchronize the Upgrades classification of update files. To do this, open the Configuration Manager console, then navigate to Administration > Site Configuration > Sites. Click to highlight the site, then select the Configure Site Components button in the actions ribbon. From the drop-down menu, select Software Update Point.
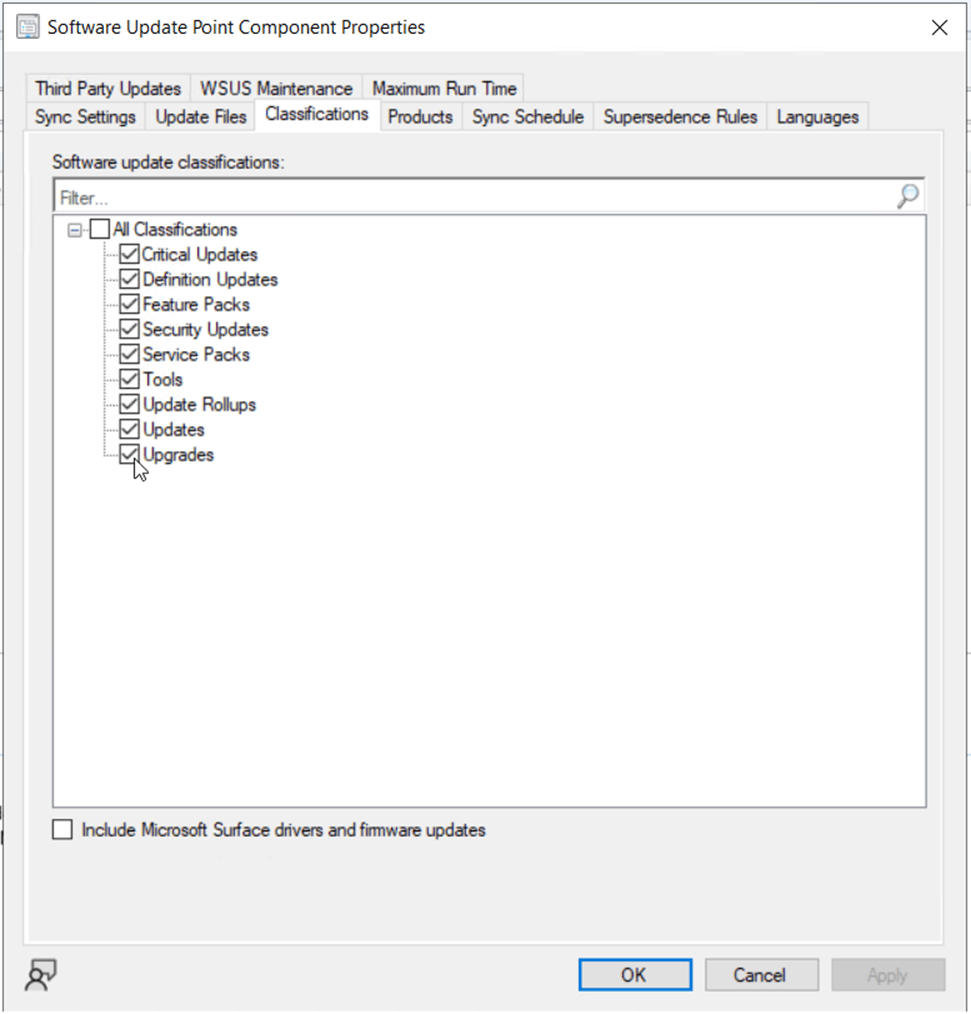
Click on the Classifications tab. If Upgrades is not already checked, select it.
Next, click on the Products tab. If Windows 11 is not already checked, select it.
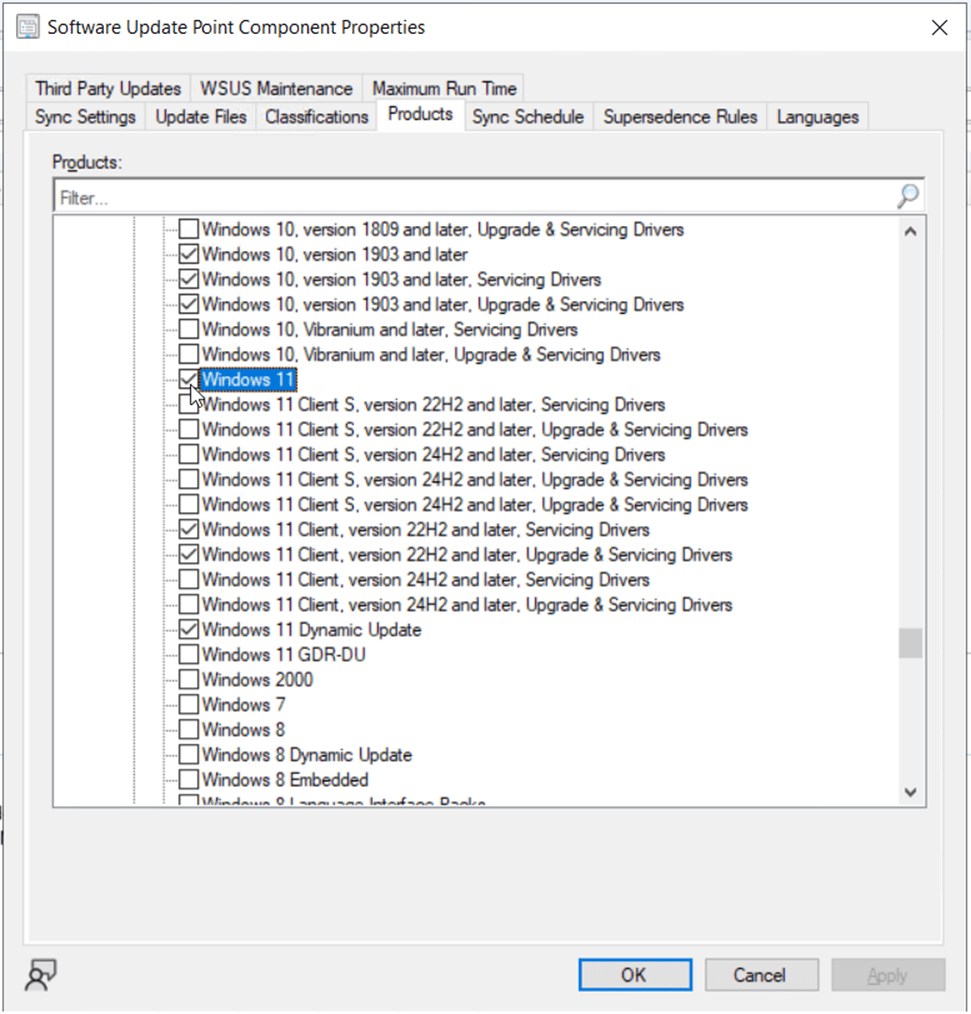
Click OK to complete the Software Update Point configuration changes.
Our final Configuration Manager site preparation step is to review/modify two client agent settings that are important for Windows 11 update deployment process. From the Configuration Manager console, navigate to Administration > Client Settings.
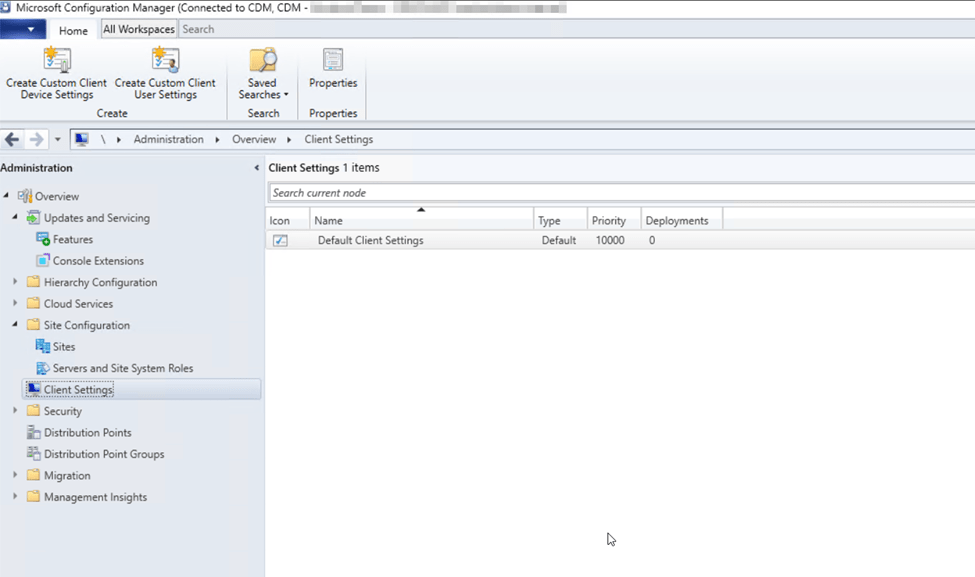
Note: I only have the Default Client Settings in my lab, but you may (and should, per industry recommendations) have multiple iterations of settings deployed to different device collections. Ensure when you edit the settings that will impact your Windows 10 clients, you are impacting the right assets and that you do not miss any devices.
To edit settings, right-click the settings and choose Properties. Find the Software Updates group and select from the list.
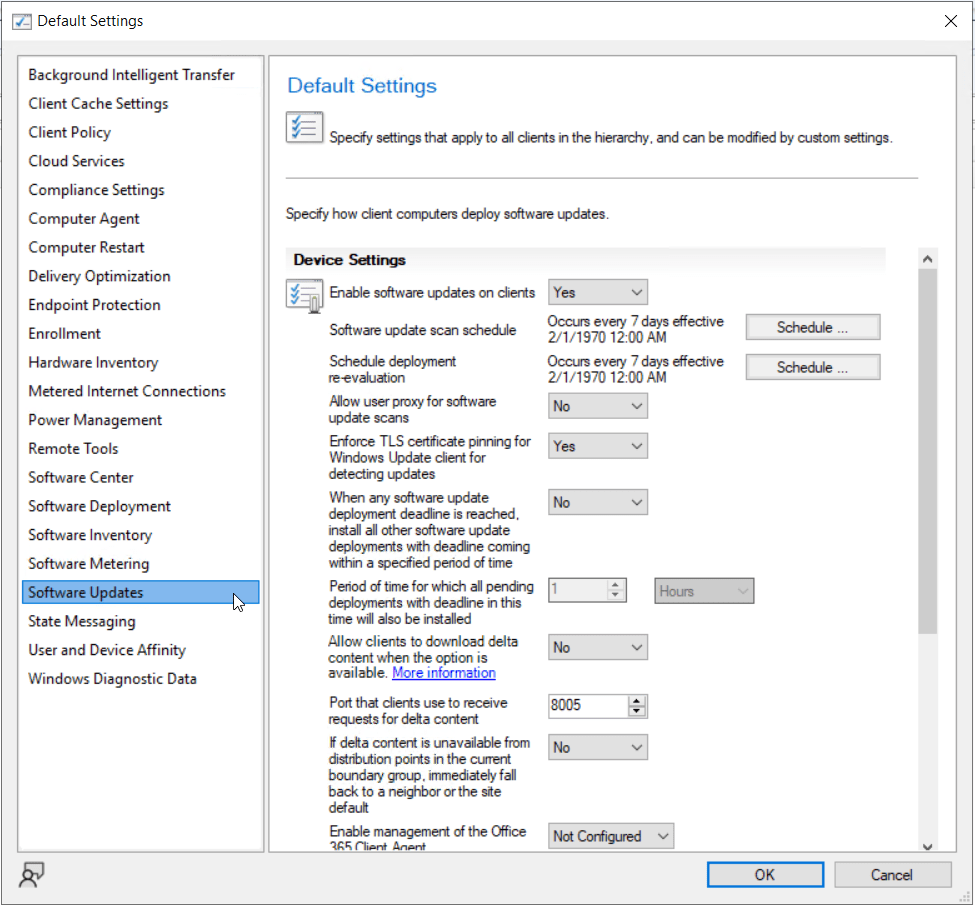
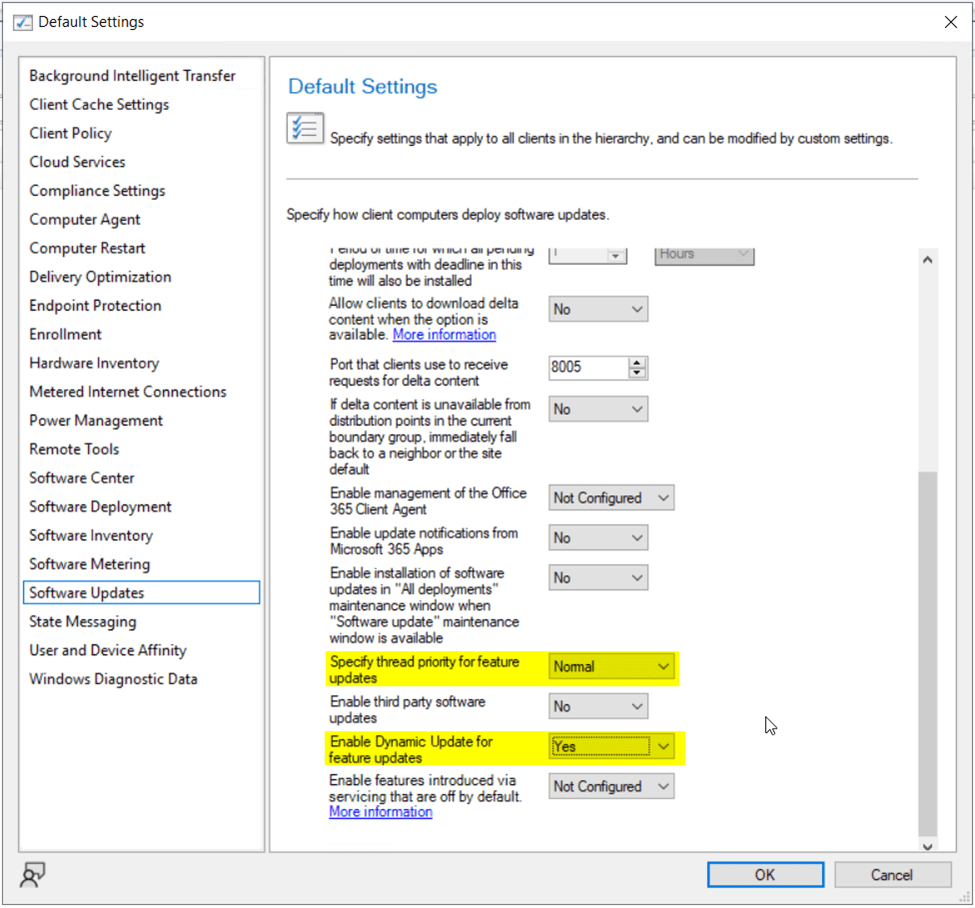
- Find the setting named Specify thread priority for feature updates and set the value to Normal.
- Find the setting named Enable Dynamic Update for feature updates and set the value to Yes.
Click OK to save the settings.
If you are trying to move forward quickly with the site configuration and pilot testing, you will need to manually force clients to retrieve the new client agent settings (Run a Machine Policy Retrieval & Evaluation Cycle from the client devices) as well as forcing a Software Update Point synchronization (Perform a Synchronize Software Updates action from the Configuration Manager console and allow time for the sync to complete). Otherwise, you should give the site time to distribute the new client agent settings and retrieve the new Windows 11 updates automatically based on built-in schedules.
Validating Windows 10 Client Upgrade Readiness (Using Built-In Tooling)
Now that the Configuration Manager site architecture can deploy Windows 11 upgrades via Windows Servicing, we need to validate that our existing Windows 10 client hardware will support the upgrade to Windows 11. Windows 11 is the most secure by default version of Windows yet. As such, some additional hardware requirements, such as a TPM 2.0 chipsets, are necessary. Thankfully, there are built-in tools in Configuration Manager that can automatically test enrolled Windows 10 devices and report back their hardware upgrade readiness status.
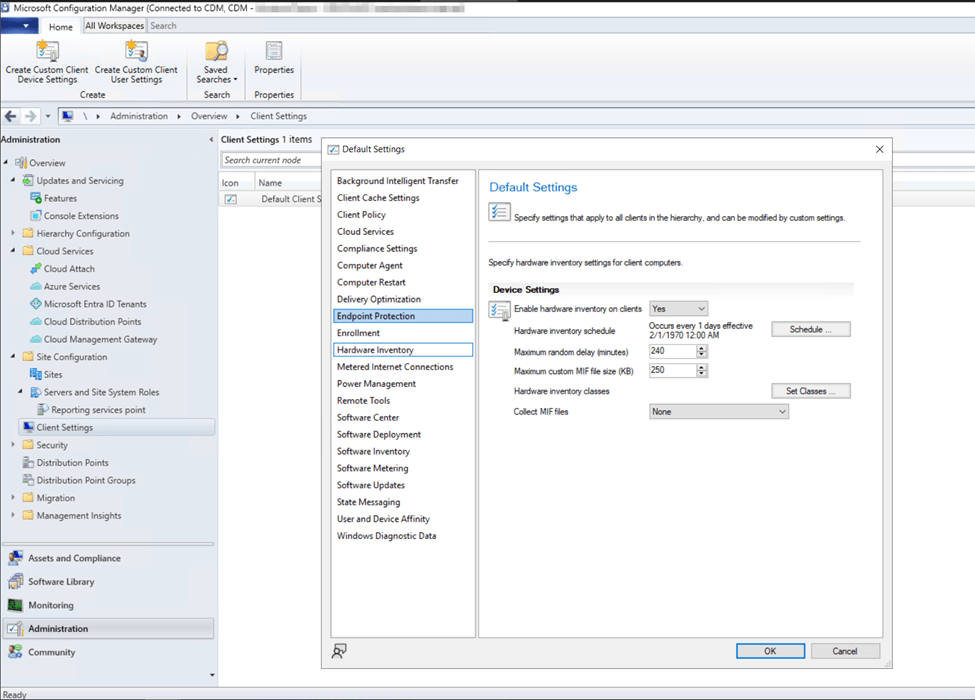
First, ensure clients are reporting hardware inventory information by verifying client settings in the Configuration Manager console: Administration > Client Settings
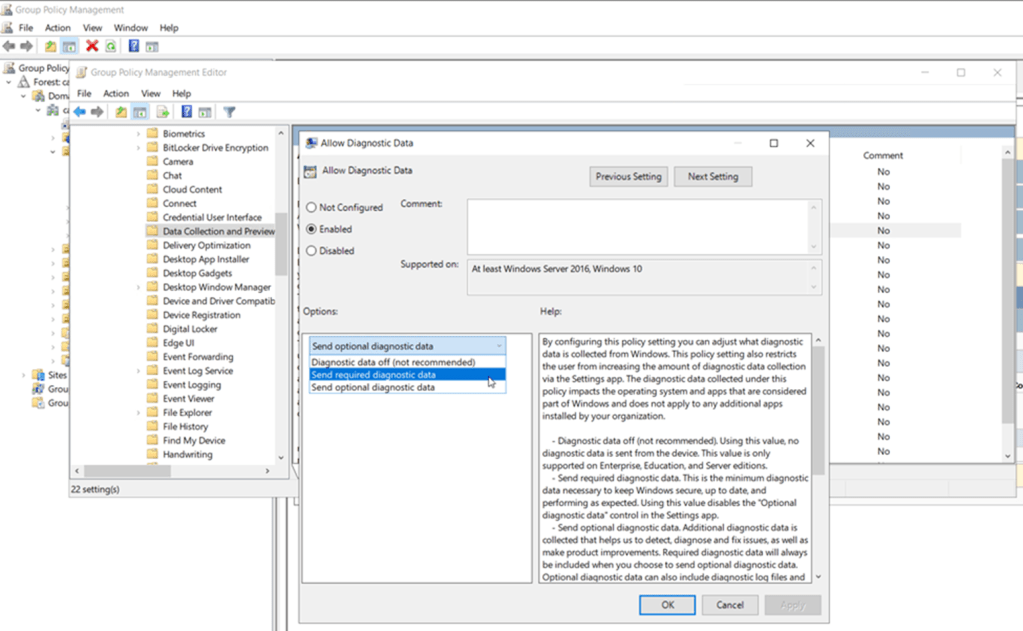
If Windows 10 clients are not already configured to provide at least basic telemetry data, use Active Directory domain-based group policy to enable the configuration at scale. Computer Configuration > Policies > Administrative Templates > Windows Components > Data Collection and Preview Builds > Allow Diagnostic Data > Allow Diagnostic Data. Configure value as “Send required diagnostic data” or “Send optional diagnostic data”
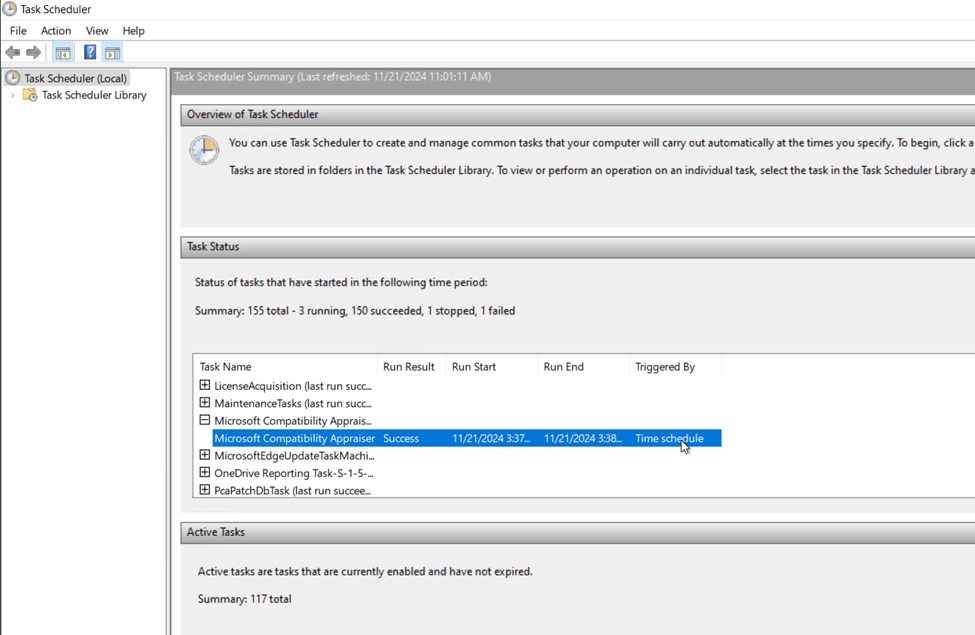
There is a scheduled task on the Windows 10 endpoints named “Microsoft Compatibility Appraiser” that will need to run prior to the Configuration Manager hardware inventory action. Verify on your Windows 10 endpoints that this task is created and has recently run. Open Task Scheduler and scroll through the Task Status list until you find the Microsoft Compatibility Appraiser task. Alternatively, you can also find this task under the folder: Task Scheduler Library\Microsoft\Windows\Application Experience. Validate a recent, successful run.
The Compatibility Appraiser will populate the registry key: HKEY_LOCAL_MACHINE\SOFTWARE\Microsoft\Windows NT\CurrentVersion\AppCompatFlags\CompatMarkers with compatibility information. The Hardware Inventory cycle action from the Configuration Manager agent will collect this data and will populate the device information in the Configuration Manager database.
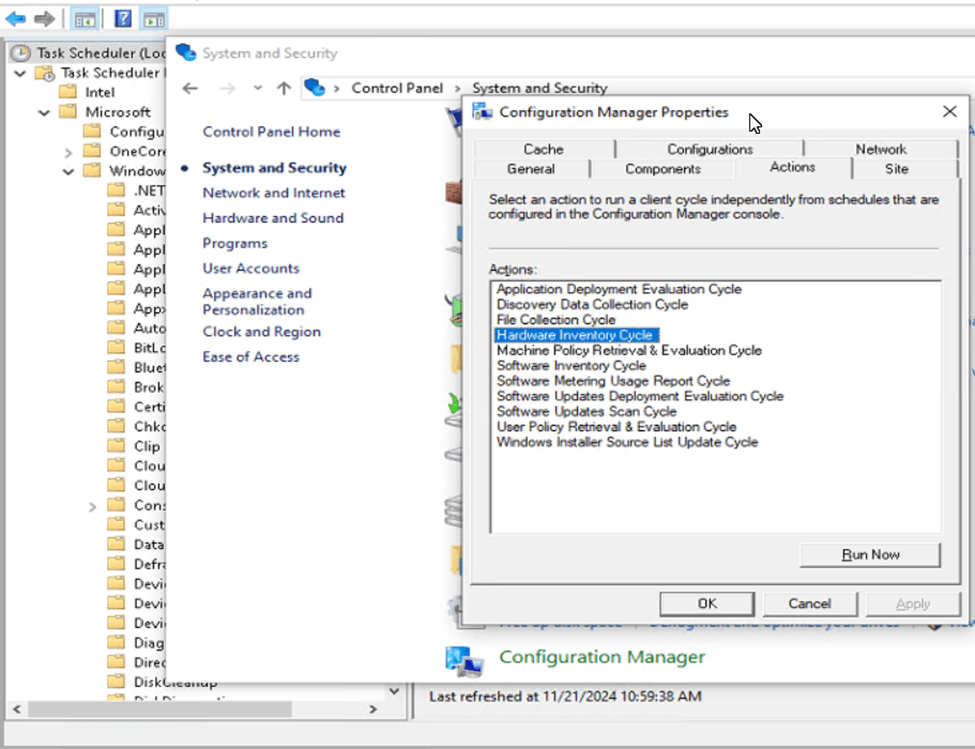
Ensure a recent Hardware Inventory cycle action has run on the client device. This can be triggered from the client by opening Control Panel > System & Security > Configuration Manager. Then navigate to the Actions tab, select Hardware Inventory Cycle and click Run Now.
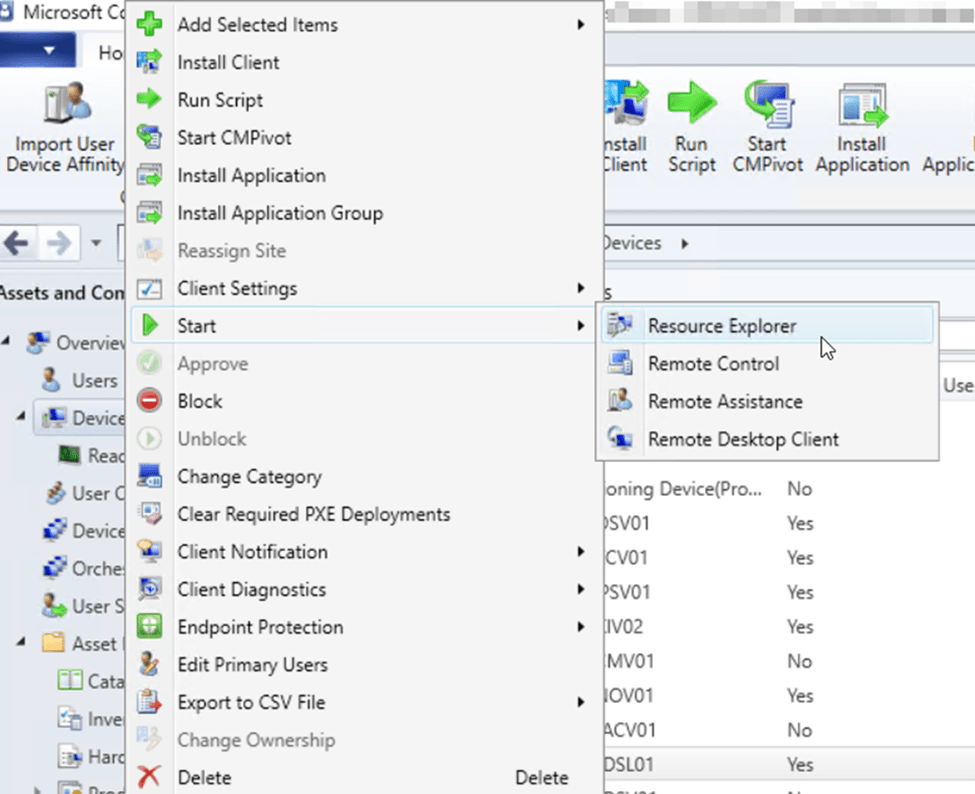
You can view the upgrade compatibility data for any single Windows 10 device by navigating to the device in the Configuration Manager console, right-clicking the device and selecting Start > Resource Explorer.
From here, expand the Hardware folder, then select UPGRADE_EXPERIENCE_INDICATORS to view the results of each individual check.
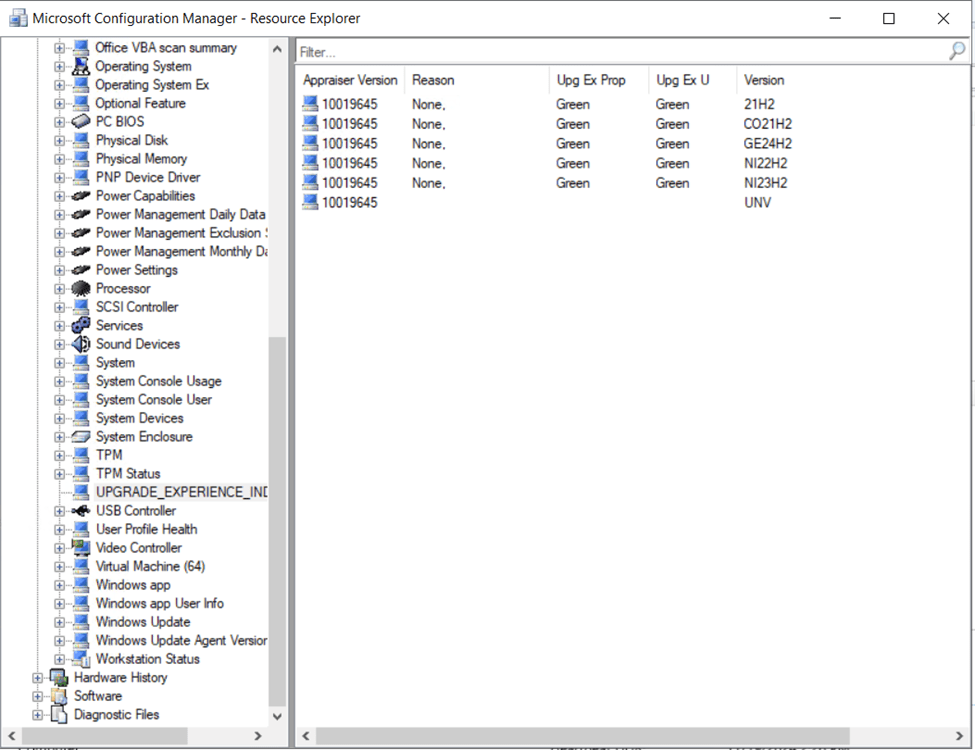
Multiple versions of Windows 10/11 are checked for compatibility. Here’s a table to help you make sense of the cryptic values (the values are built off the Windows build codenames):
| 21H2 | Windows 10 21H2 |
| CO21H2 | Windows 11 21H2 (Cobalt) |
| NI22H2 | Windows 11 22H2 (Nickel) |
| NI23H2 | Windows 11 23H2 (Nickel) |
| GE24H2 | Windows 11 24H2 (Germanium) |
The upgrade experience markers (Upg Ex Prop & Upg Ex U) will indicate a color based on the readiness state of the device to upgrade to that particular version of Windows 11. Green obviously means the device is capable of upgrading with no issues. Here’s a link to the official docs article from Microsoft that speaks to the color indicators as well as what tests cause certain color indicators to display: https://learn.microsoft.com/en-us/mem/configmgr/osd/deploy-use/manage-windows-11-readiness-dashboard#upgrade-experience-marker
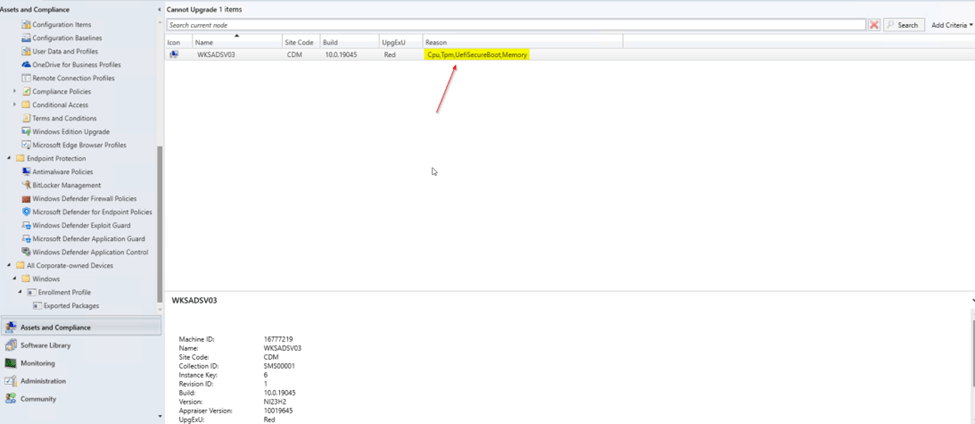
If a device fails any of the readiness checks, in addition to an experience marker color showing as orange or red, there should also be more details on what exactly failed in the Reason column.
To view the readiness state of all Windows 10 devices in the environment, use the Windows 11 Readiness Dashboard found in the Configuration Manager console under Software Library > Windows 11 Upgrade Readiness.
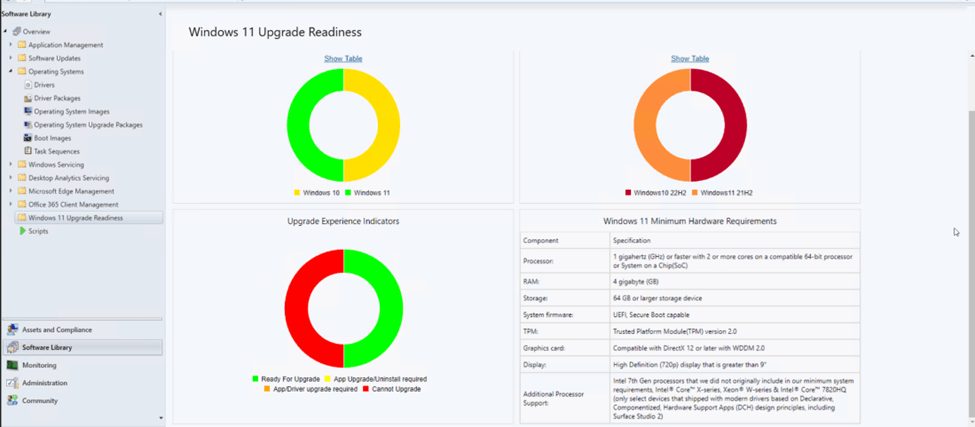
From the Upgrade Experience Indicators chart, you can drill into devices that are reporting unable to upgrade. The Reason column will indicate why the upgrade readiness checks have failed.
Deploying Windows 11 23H2 Update via Microsoft Configuration Manager – Option 2
Deployment via Software Updates in Configuration Manager
Now that we’ve validated all the requirements for both clients and the Microsoft Configuration Manager site to deploy and upgrade devices to Windows 11 23H2, we will configure the necessary Configuration Manager site objects/components to deploy the in-place upgrade via Software Updates. In this option (Option 2), we will deploy the update using the Software Updates feature.
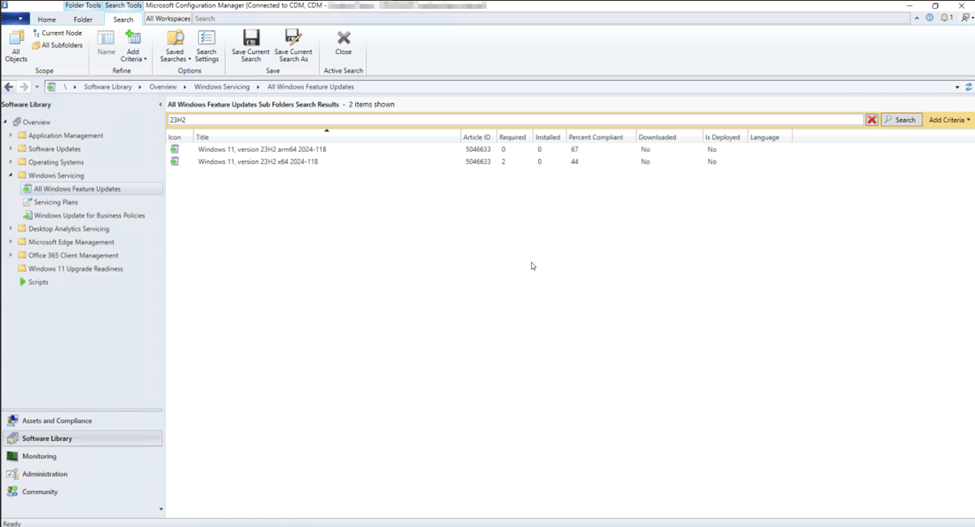
From the Configuration Manager console, navigate to Software Library > Windows Servicing > All Windows Feature Updates.
In the search bar, enter 23H2 then click Search. Two results should show up if the Software Update Point configuration is correct and a synchronization has occurred since the Windows 11 product and Updates classifications were added to the configuration.
Select either the “arm64” or the “x64” version of the update you want to deploy. Right-click then select Review License.
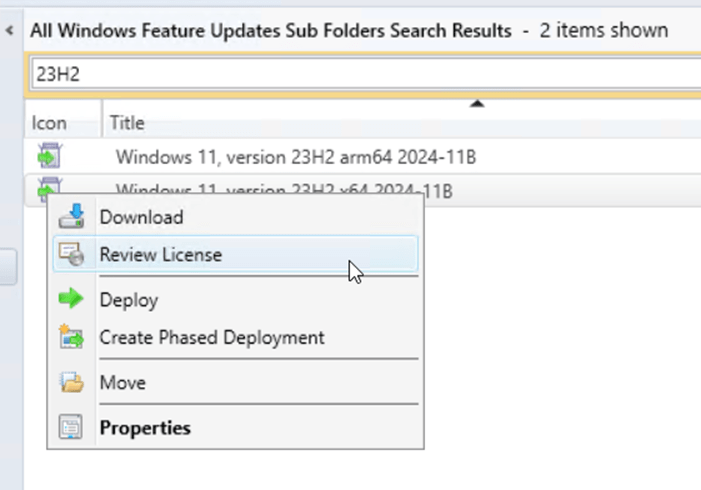
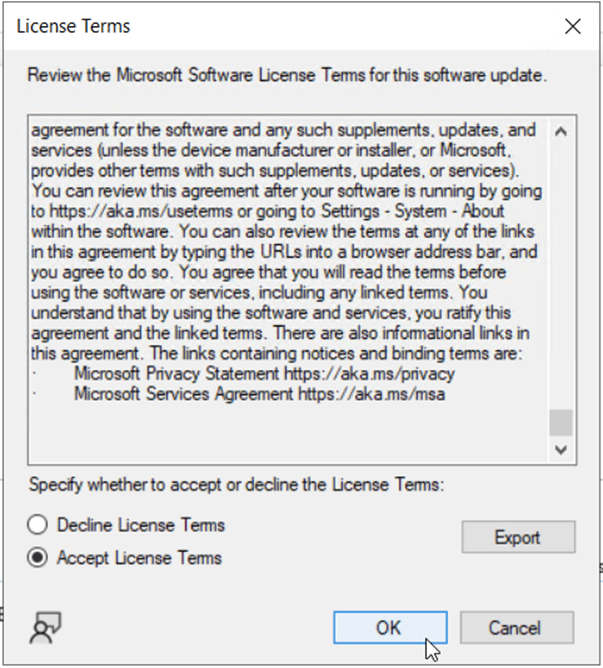
Select the Accept License Terms radio button, if you agree to the terms, then click OK.
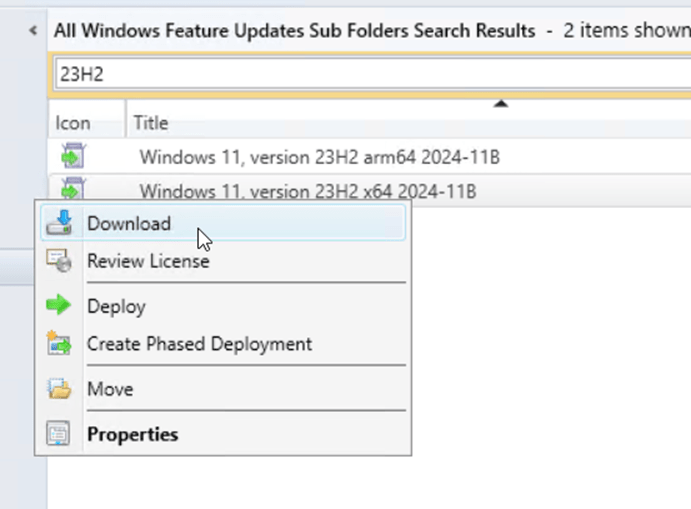
Right-click on the same update version again, this time selecting Download.
On the first page of the Download Software Updates Wizard, click the radio button to Create a new deployment package. Give the package an appropriate name, such as “Windows 11 23H2 Feature Update”, a description, and specify the location of your network accessible software update package source files.

Click Next to continue.
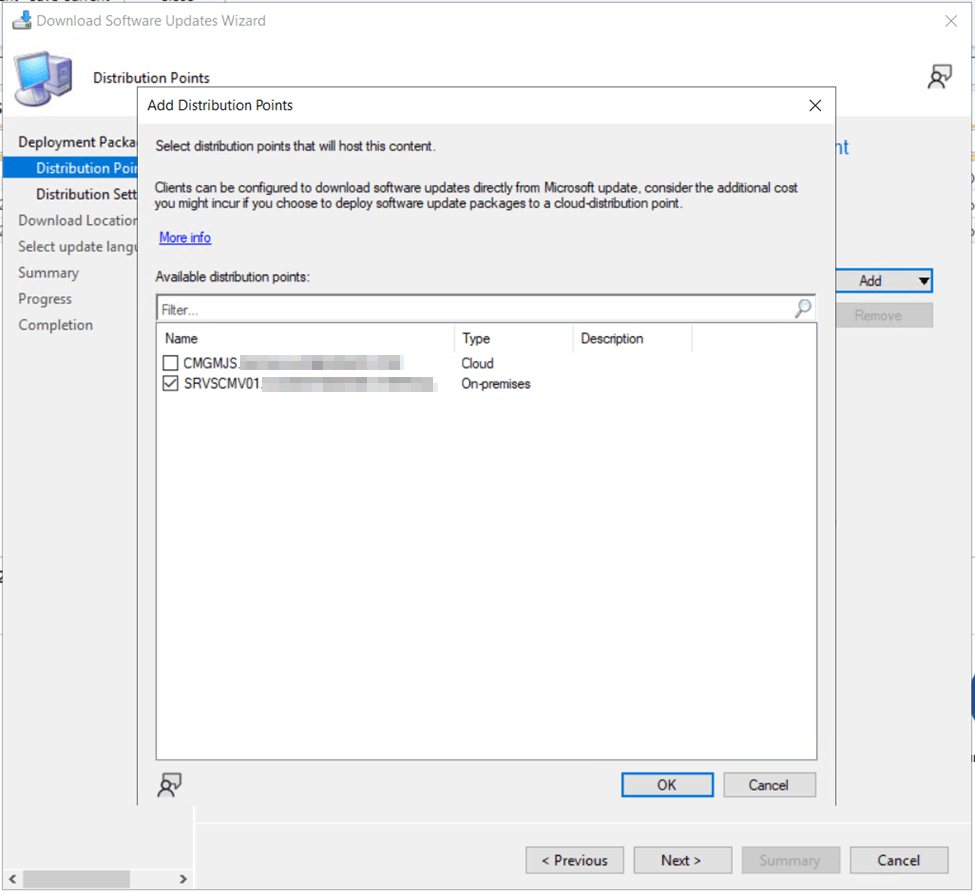
On the Distribution Points selection page, click Add then specify which distribution points, distribution point groups and cloud management gateways (if applicable to your site) the update will be stored on for distribution to clients. Click OK when done.
NOTE: While it may sound like a good idea to place the Windows 11 feature update on your cloud management gateways so your clients can access the update regardless of their location, remember you are charged for bandwidth from the cloud management gateways to your clients. The distribution of large updates/applications to many devices can lead to more costly monthly charges to your Azure subscription so beware of the implications. A better architecture to deliver Windows 11 upgrades to remote clients would be via co-management with Intune (More on that in Part III…)
Click Next to move to the next page of the wizard.
On the Distribution Settings page, you can leave settings at their defaults and click Next to continue.

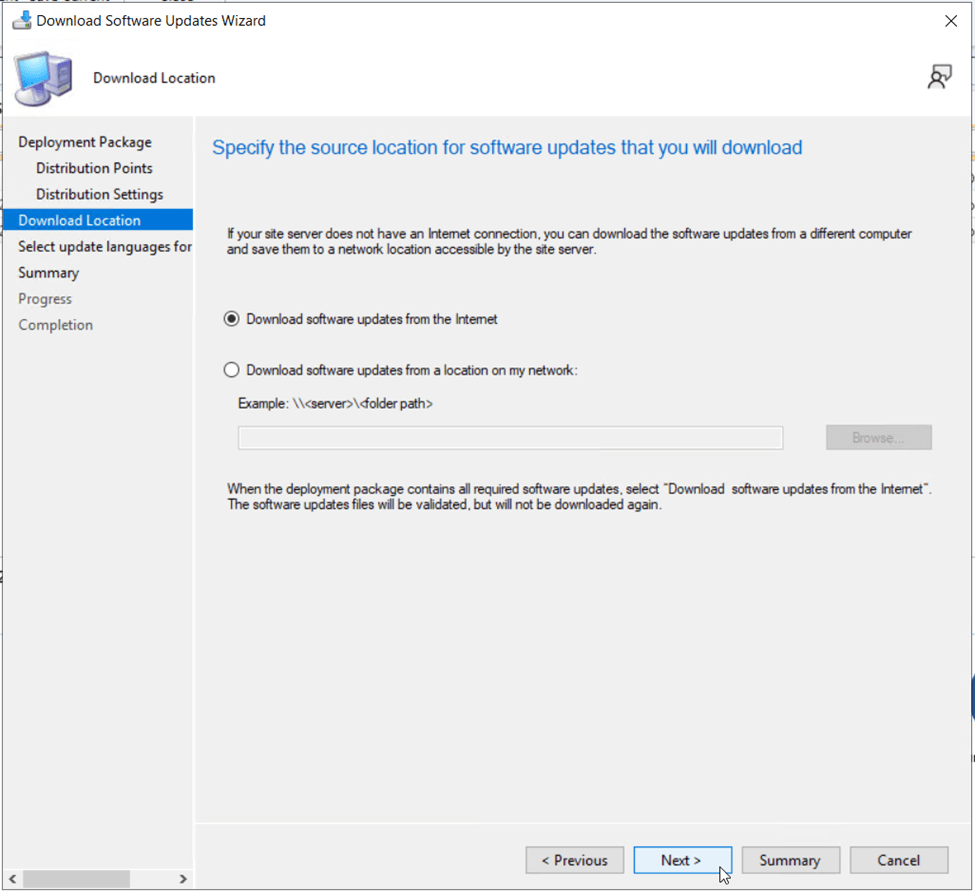
On the Download Location page, leave Download software updates from the Internet selected and click Next to continue.
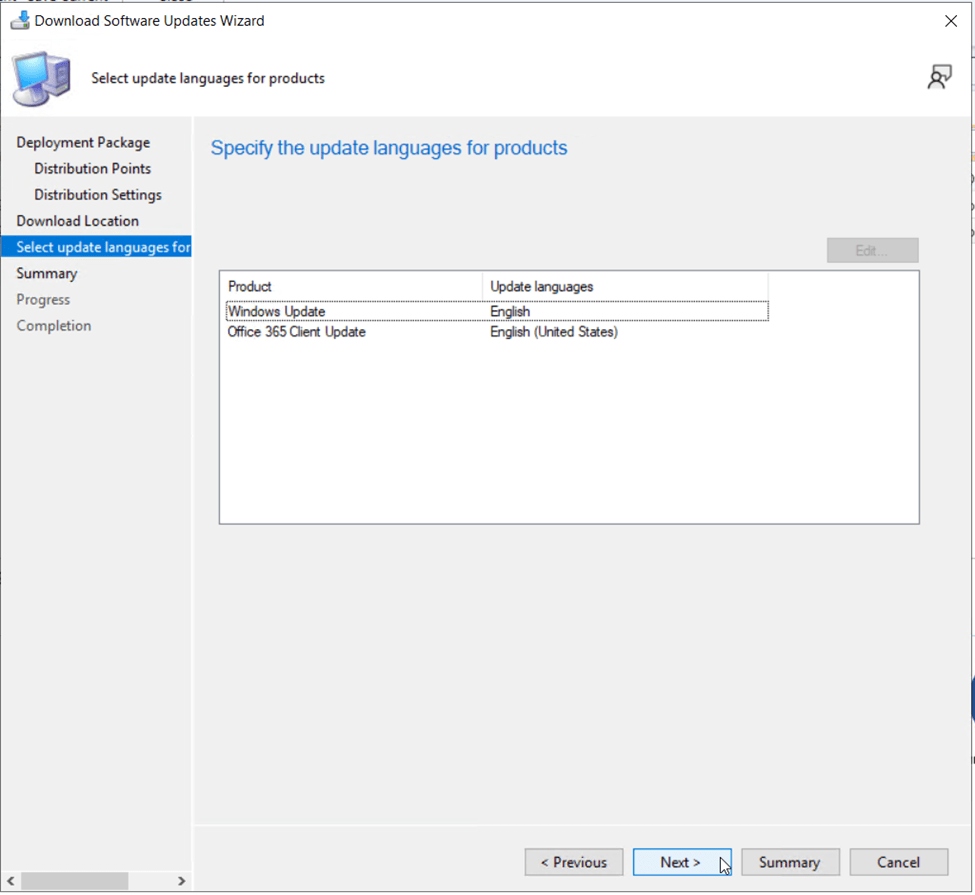
On the Select update languages for products page, leave the settings at their defaults or modify based on your locale. Click Next to proceed.
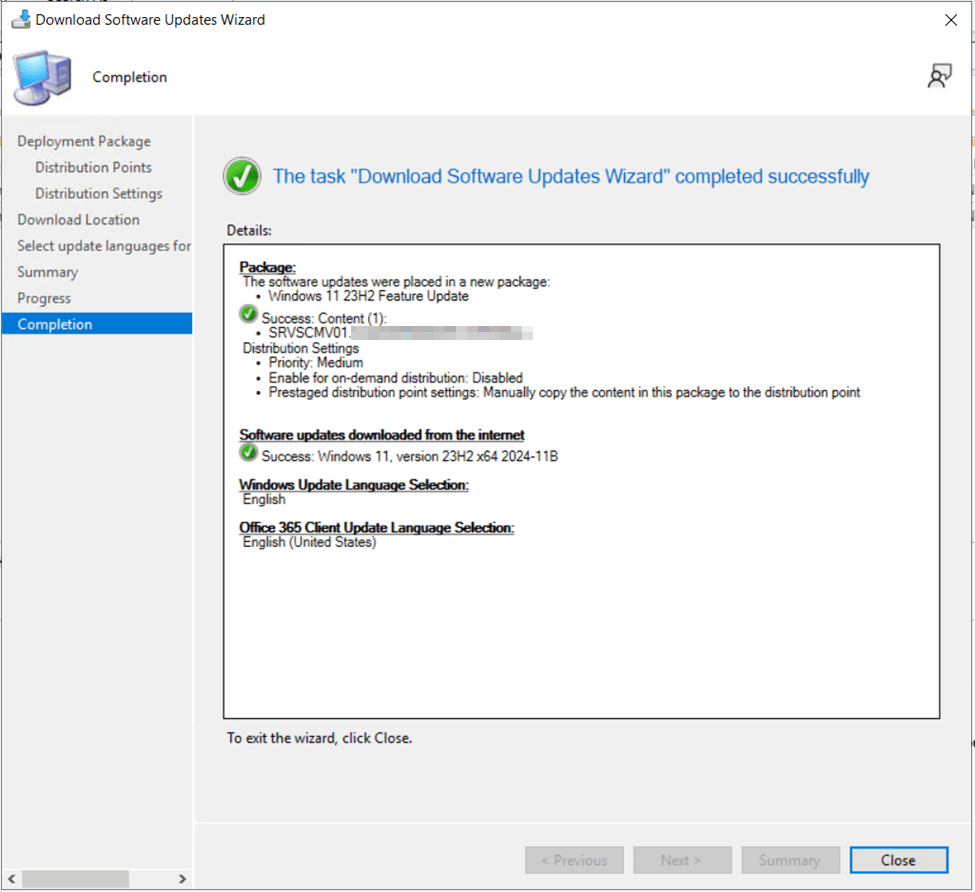
Review all previous settings on the Summar page, then click Next to commit the new package creation settings.
The feature update will now begin to download and distribute to your site infrastructure based on the software update package we just created.

With the feature update downloaded, we can now begin the process of deploying the update to our client devices.
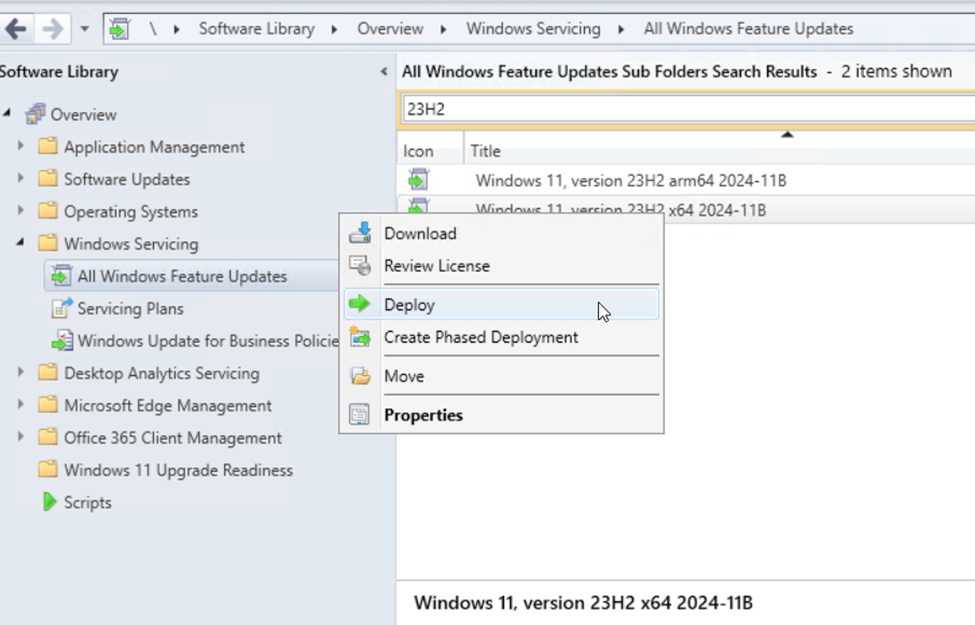
From the All Windows Feature Updates screen in the Configuration Manager console, find the Windows 11 23H2 feature update we just distributed. Right-click and select Deploy.
On the General tab of the Deploy Software Updates wizard, specify a Name and Description. A Software Update/Software Update Group will be automatically created for you. Under target collection, specify a pilot collection of Windows 11 23H2 ready client devices (We created this earlier in the preparation steps, “Clients Ready for Upgrade to Windows 11 23H2”).
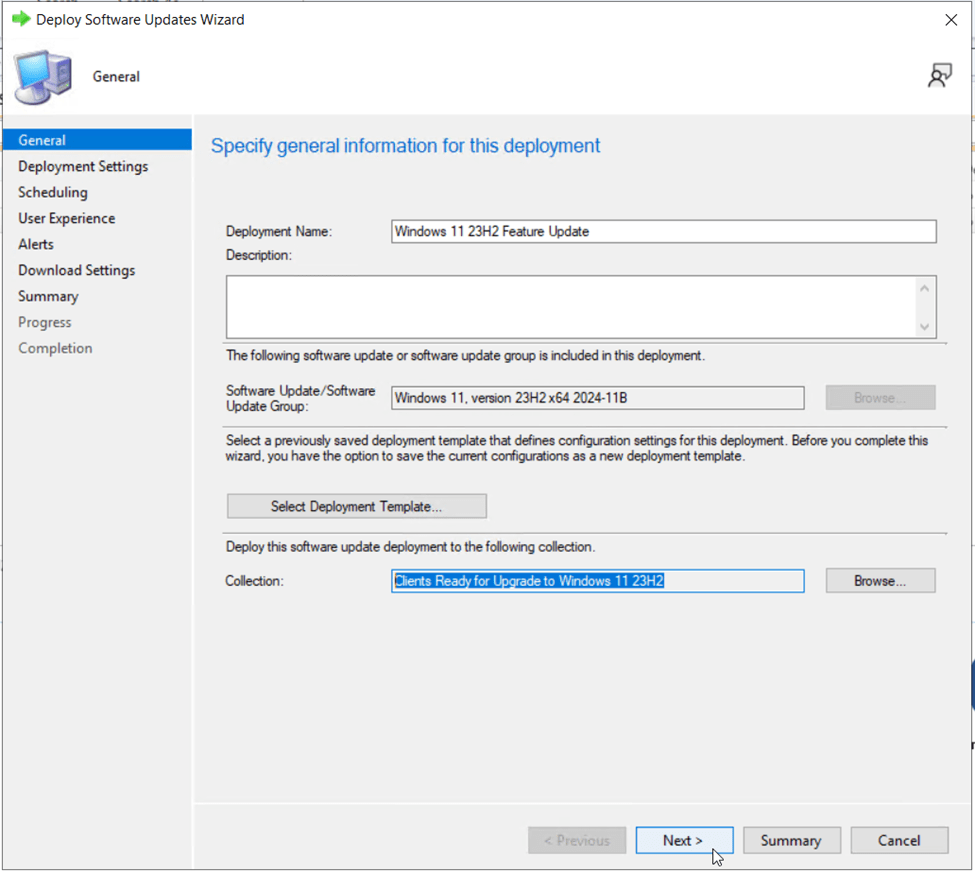
Click Next to continue.
On the Deployment Settings page, set the type of deployment to Available. This will publish the Windows 11 23H2 update to users via Software Center where they can pick a date/time that works for them to perform the upgrade. As your Windows 11 upgrade deadline approaches, this can be transitioned to a “Required” deployment to force remaining users through the upgrade.
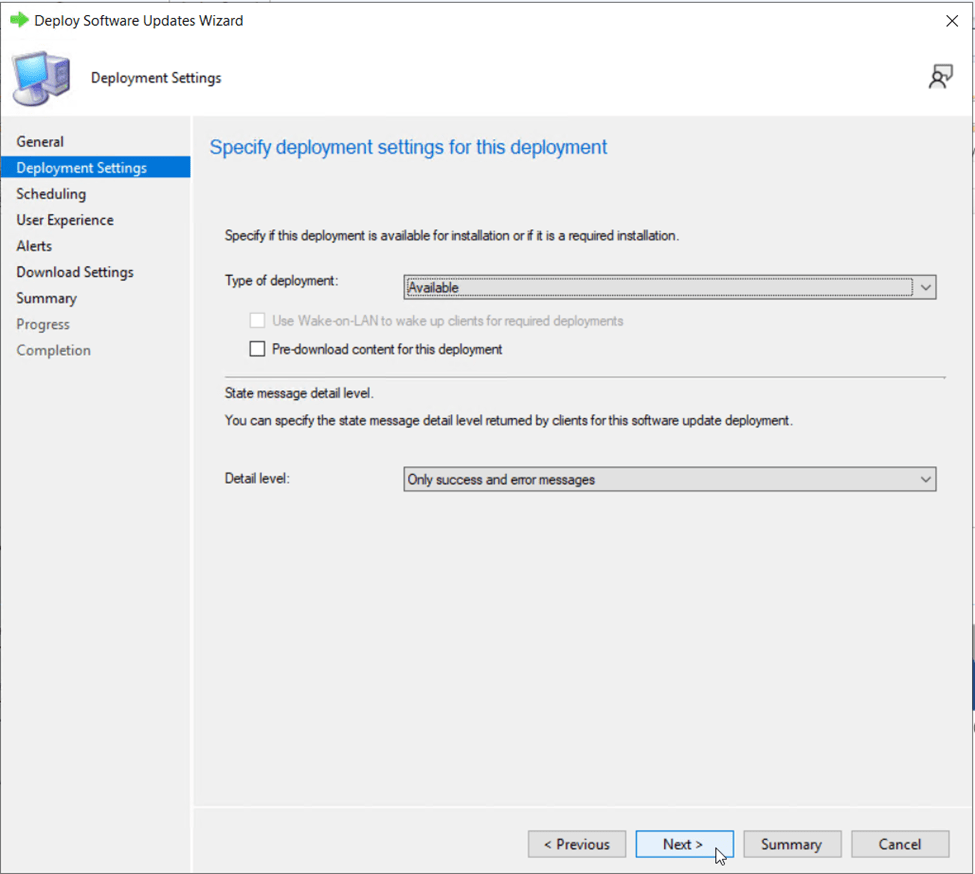
Click Next to continue.
On the Scheduling page, select a time for the Windows 11 23H2 update to be advertised to users. Since I am choosing to make the update available to users for optional, self-service installation, I will only see the option for “software available time” and not “installation deadline”. In my scenario, As soon as possible is the best choice.
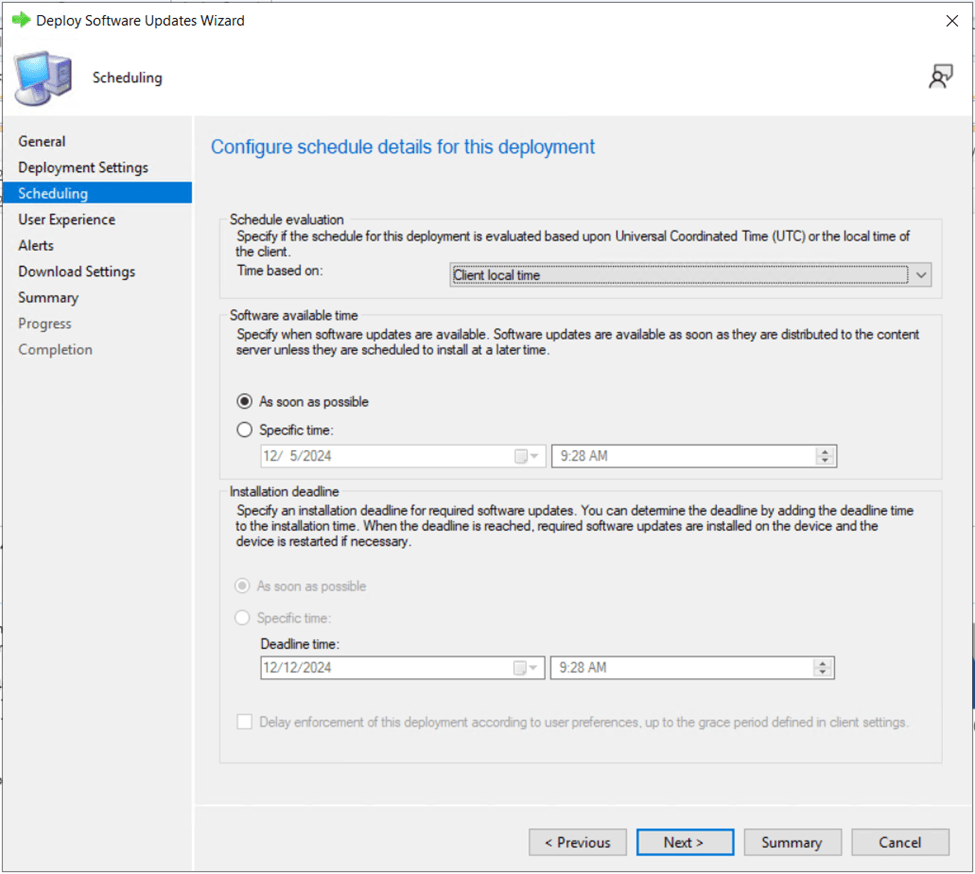
Click Next to continue.
On the User Experience page, change the User Notifications to Display in Software Center and show all notifications. Leave everything else at the defaults.
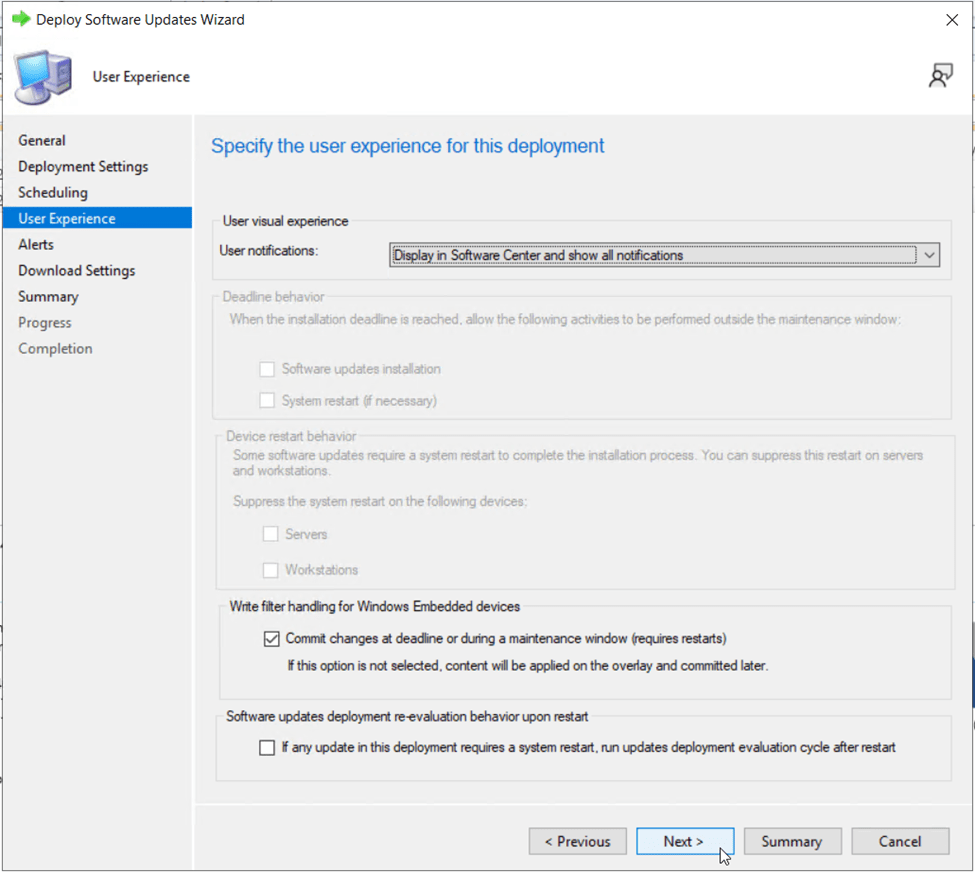
Click Next to continue.
Leave everything on the Alerts page at their defaults.
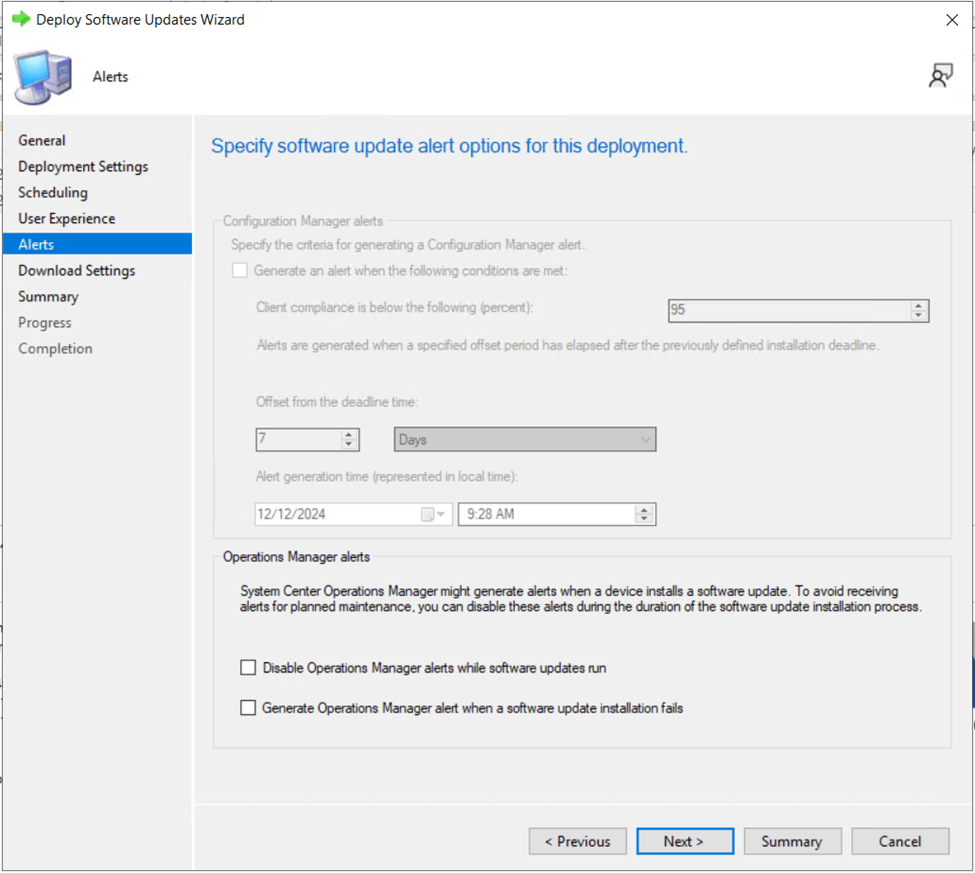
Click Next to continue.
Again, I’ll leave the default settings on the Download Settings page as these settings work for my site architecture. You may need to modify based on your site topology.
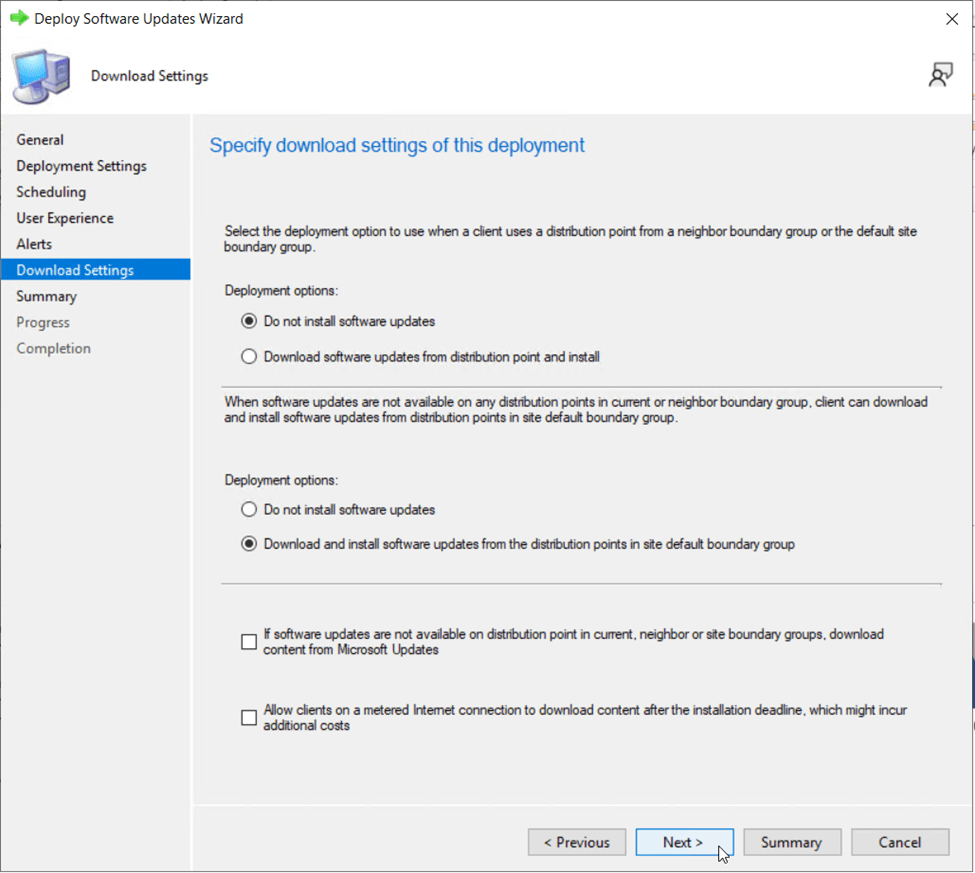
Click Next to continue.
Review all the previous settings on the Summary page, then click Next to commit the deployment.
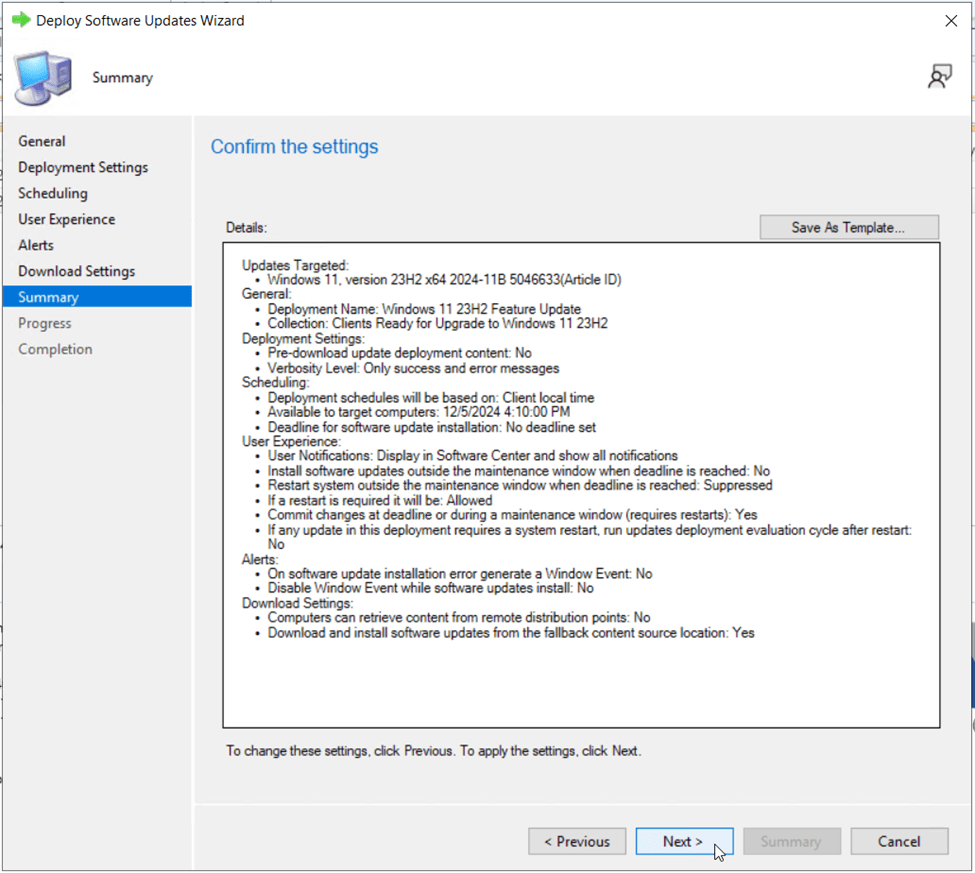
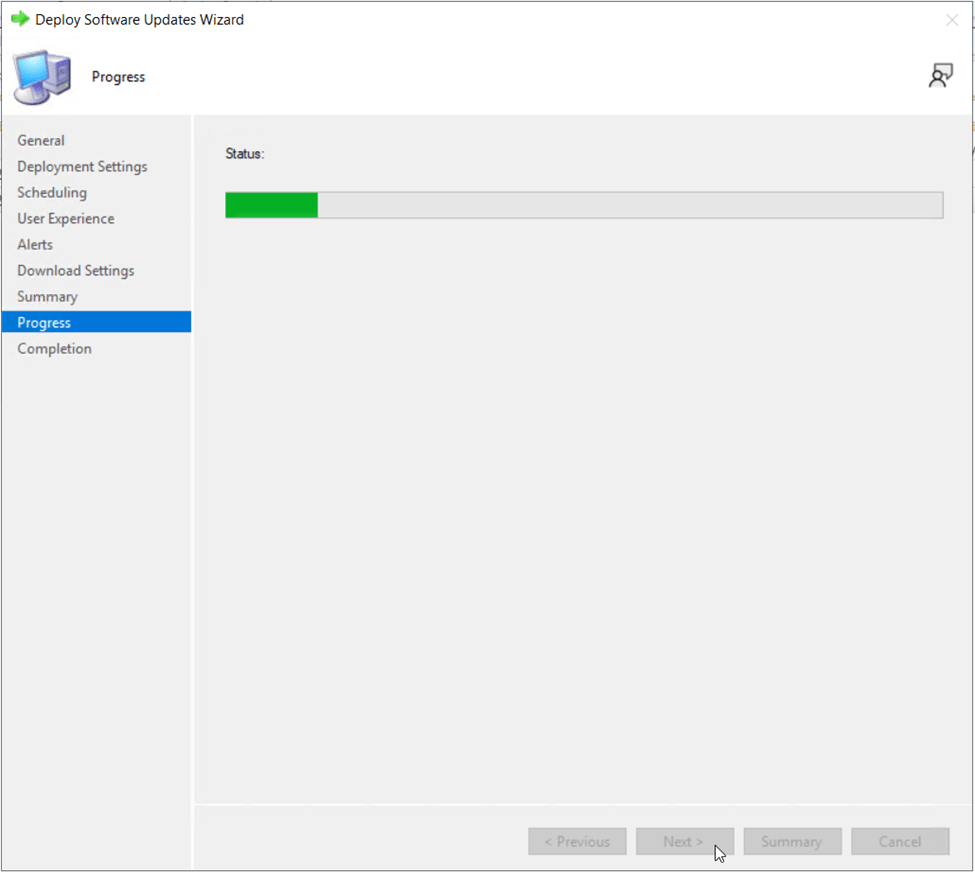
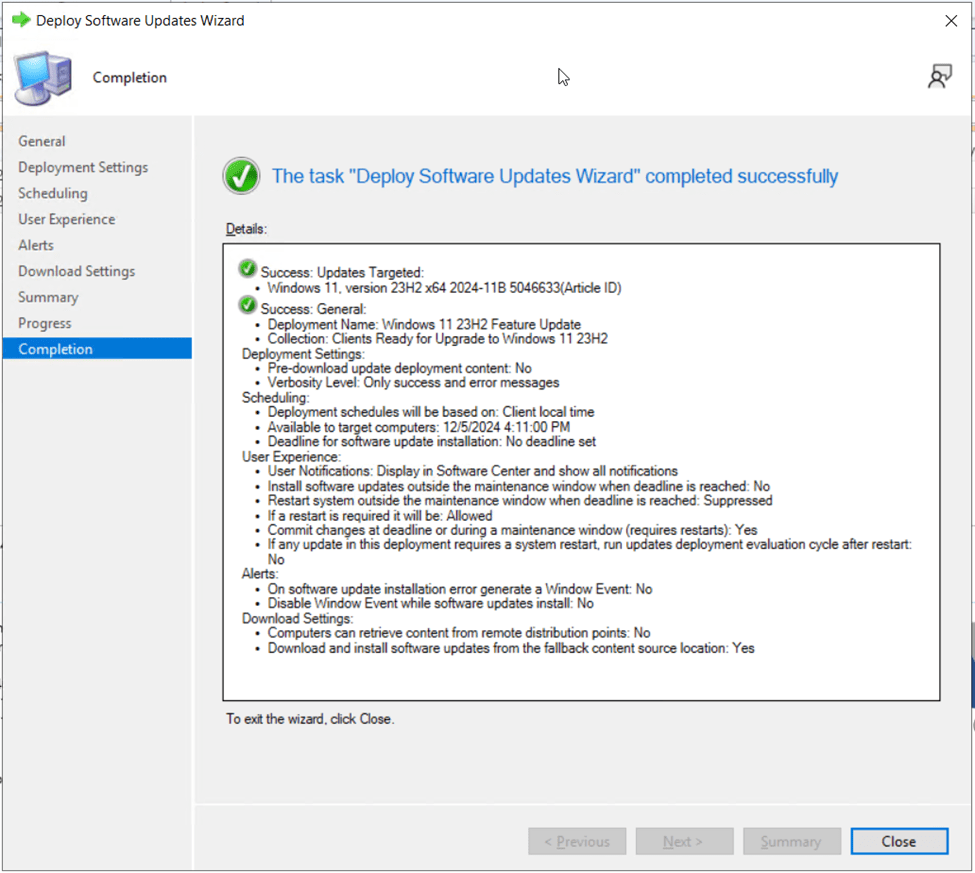
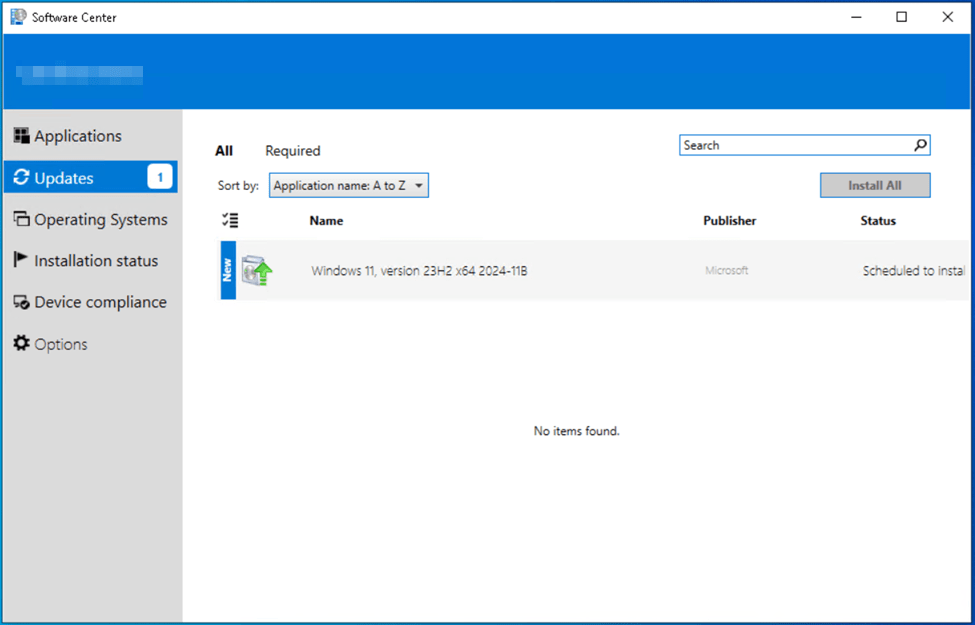
You can now monitor the deployment of the Windows 11 23H2 update to users from the deployments page. Users should begin to see the Windows 11, version 23H2 x64 2024-11B update show up in Software Center on their devices under the Updates section the next time the device checks in and retrieves the new deployment.
User Experience from Deployment via Software Updates
From the Software Center application on the Windows 10 client devices…
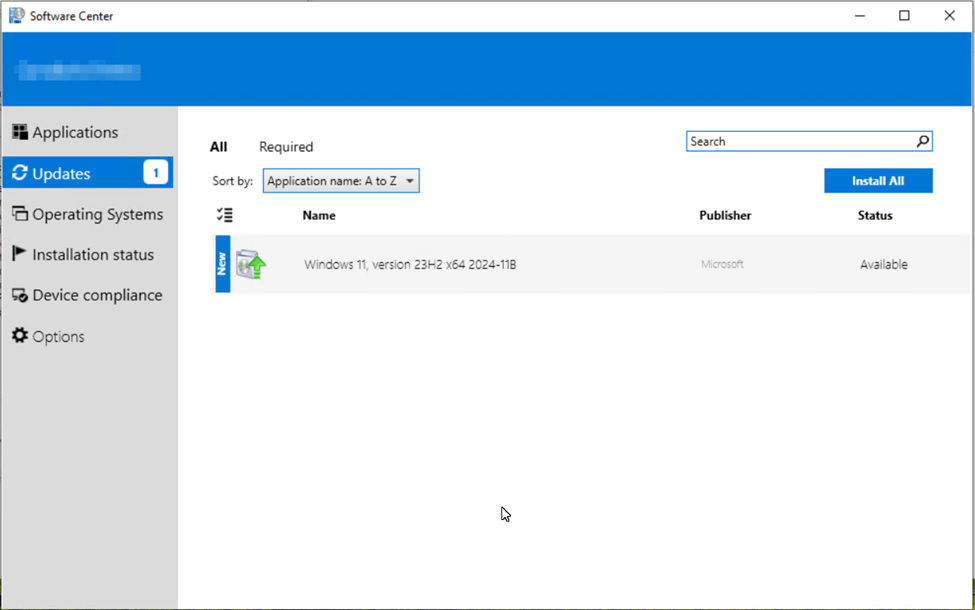
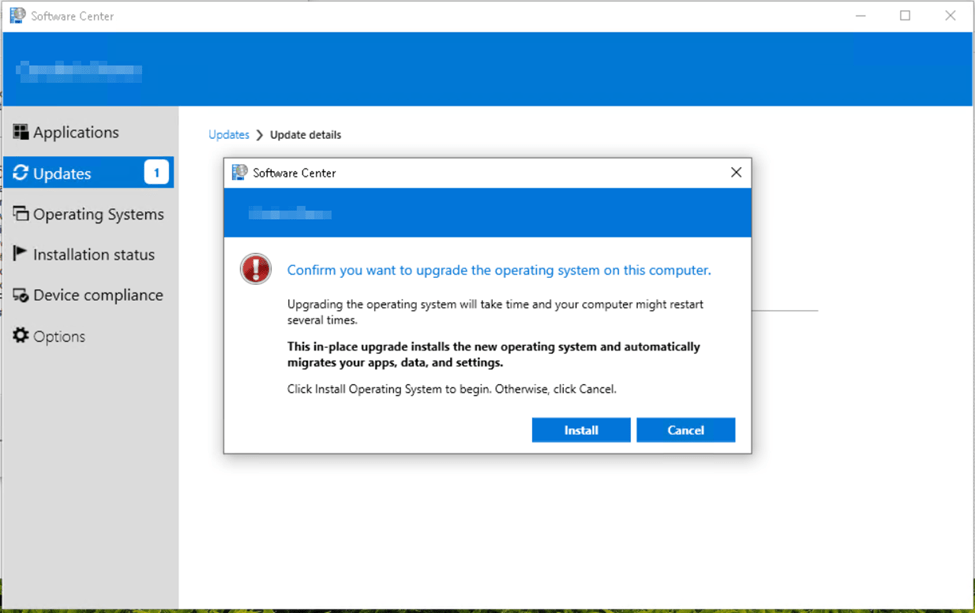
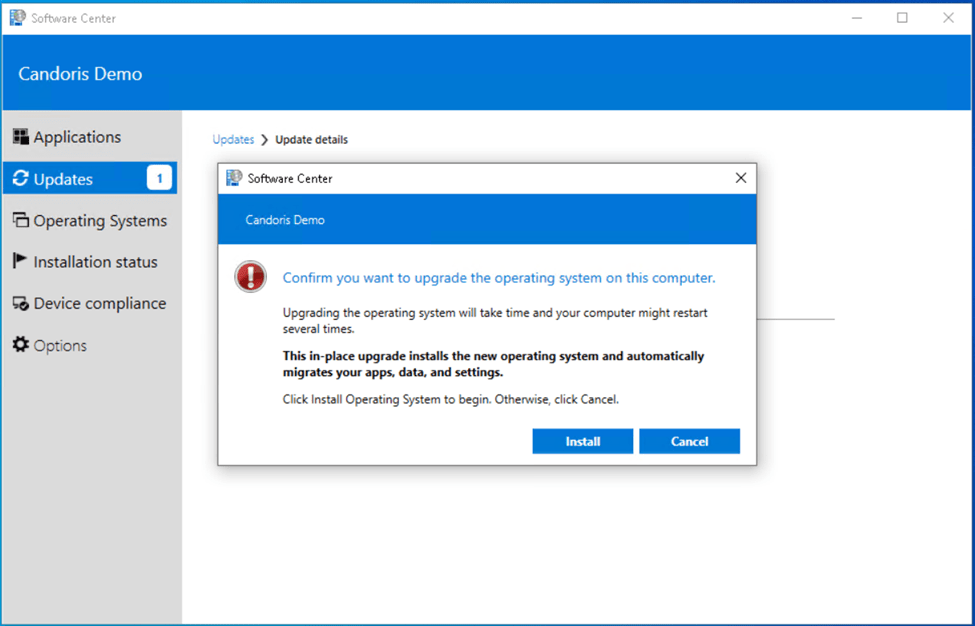
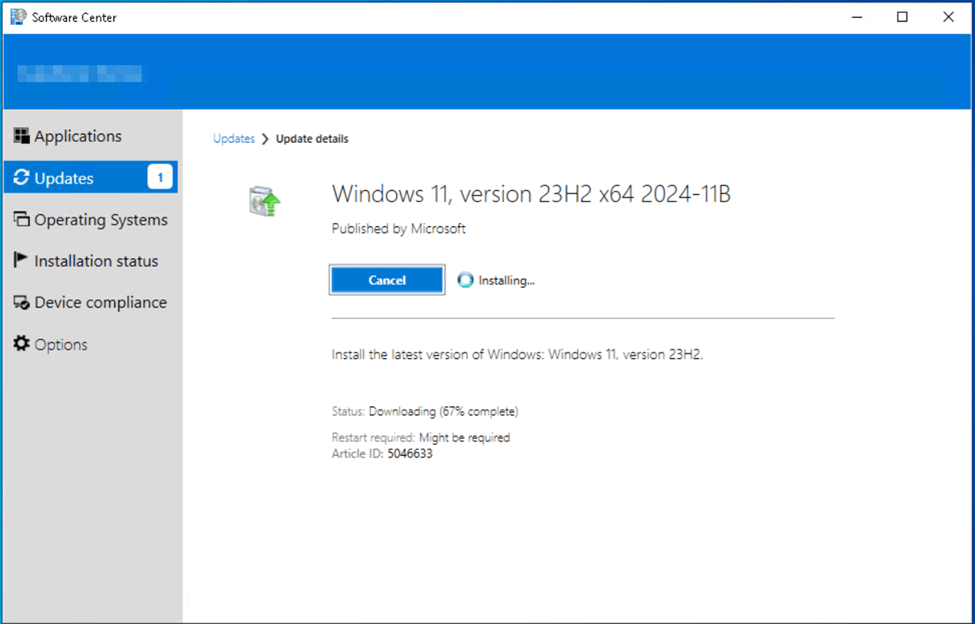
Users can click the update, then select Install then they are ready to kick off the upgrade.


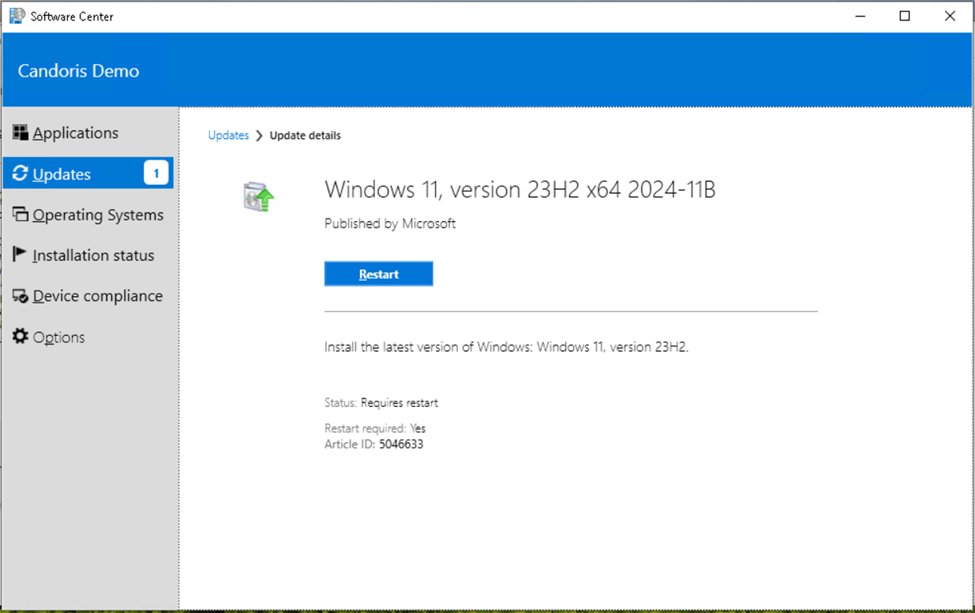

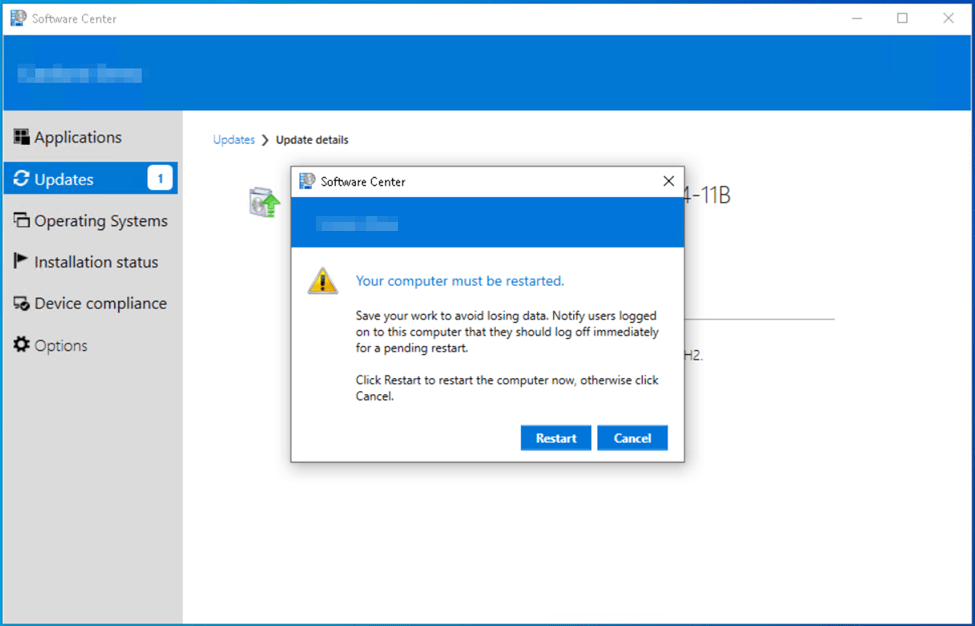
Once the reboot completes, the user is brought to the Windows 11 sign in screen and the upgrade is complete.
Continue to monitor the Windows 11 Upgrade Readiness dashboard and deployment success of the software update deployment for users that manually initiate the upgrade.
Note: The upgrade from the screenshots was done on a physical Dell laptop and took approximately 1 hour and 35 minutes from start to finish. This was considerably longer than the 35 minutes it took the task sequence method addressed in Part I of the series.
Deploying Windows 11 23H2 Update via Microsoft Configuration Manager – Option 3
Deployment via Servicing Plans in Configuration Manager
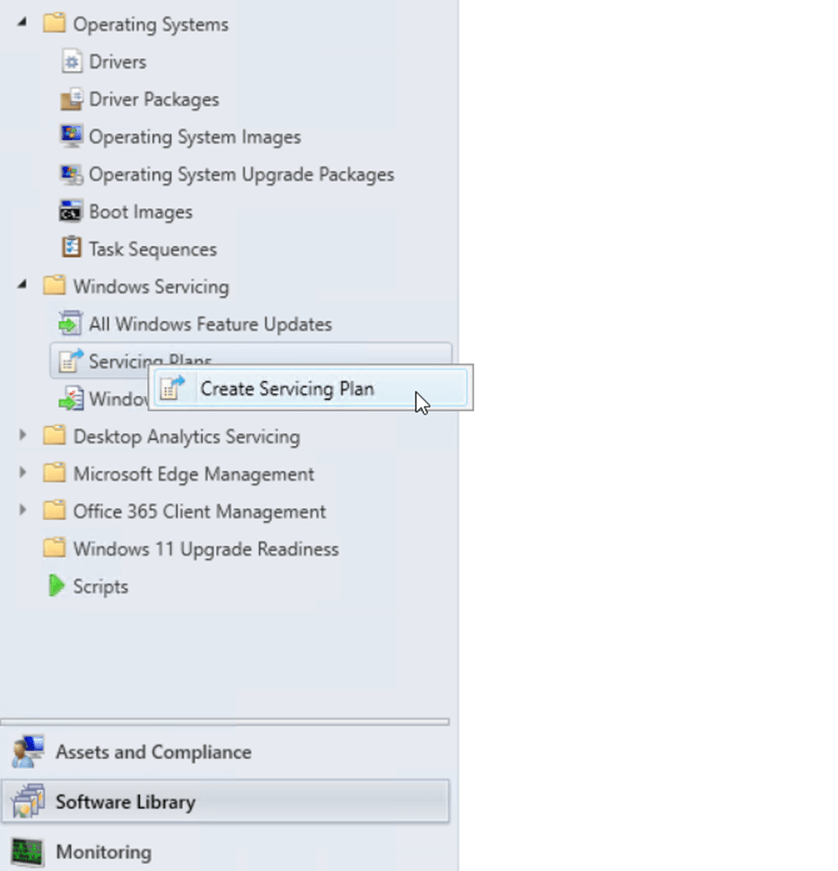
From the Configuration Manager console, navigate to Software Library > Windows Servicing > All Servicing Plans.
Right-click on Servicing Plans and select Create Servicing Plan.
Give the Servicing Plan a Name and Description.
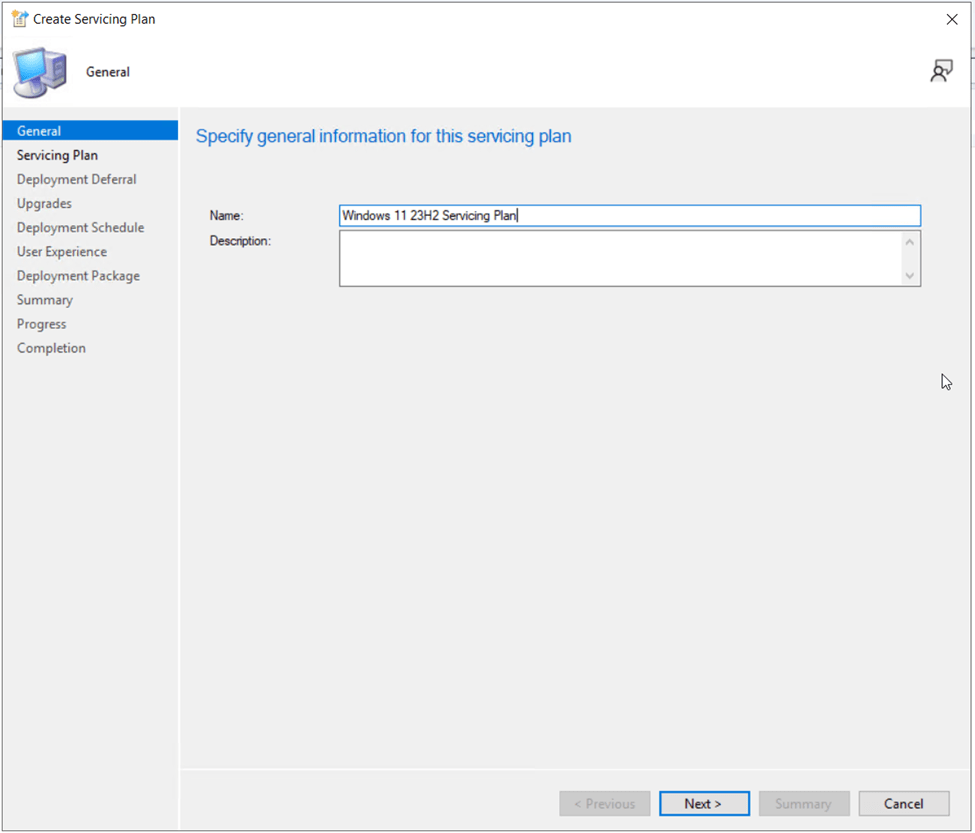
Click Next to continue.
On the Servicing Plan page of the wizard, specify the Target Collection for the upgrade. Specify a pilot collection of Windows 11 23H2 ready client devices (We created this earlier in the preparation steps, “Clients Ready for Upgrade to Windows 11 23H2”).
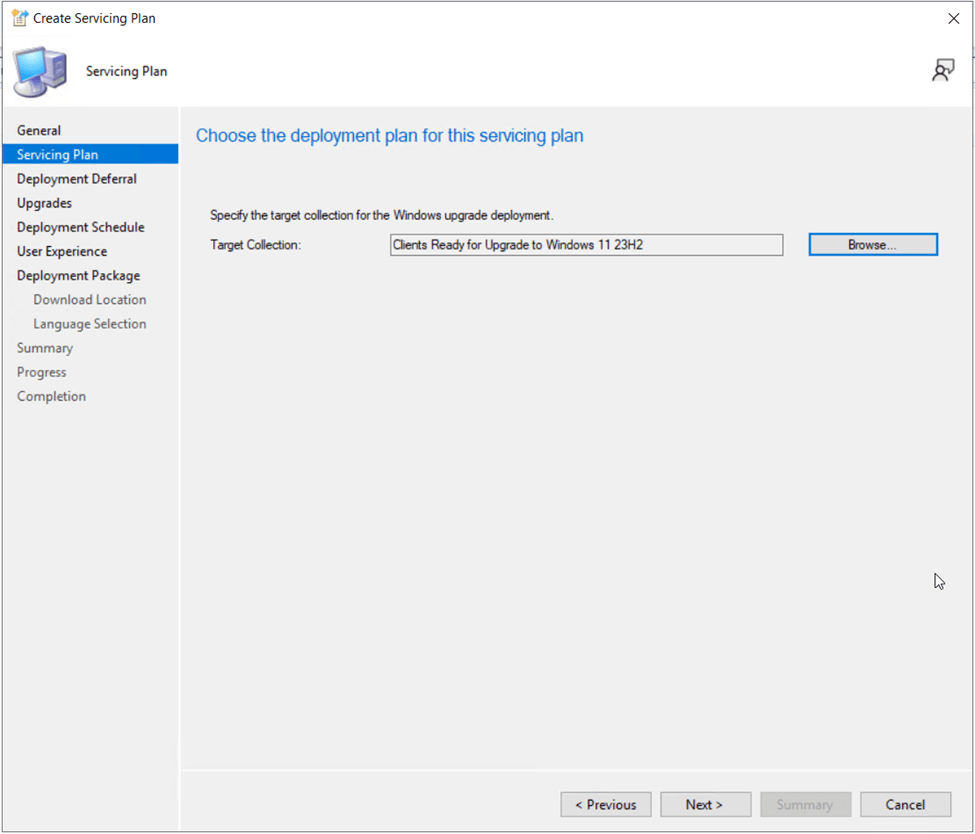
Click Next to continue.
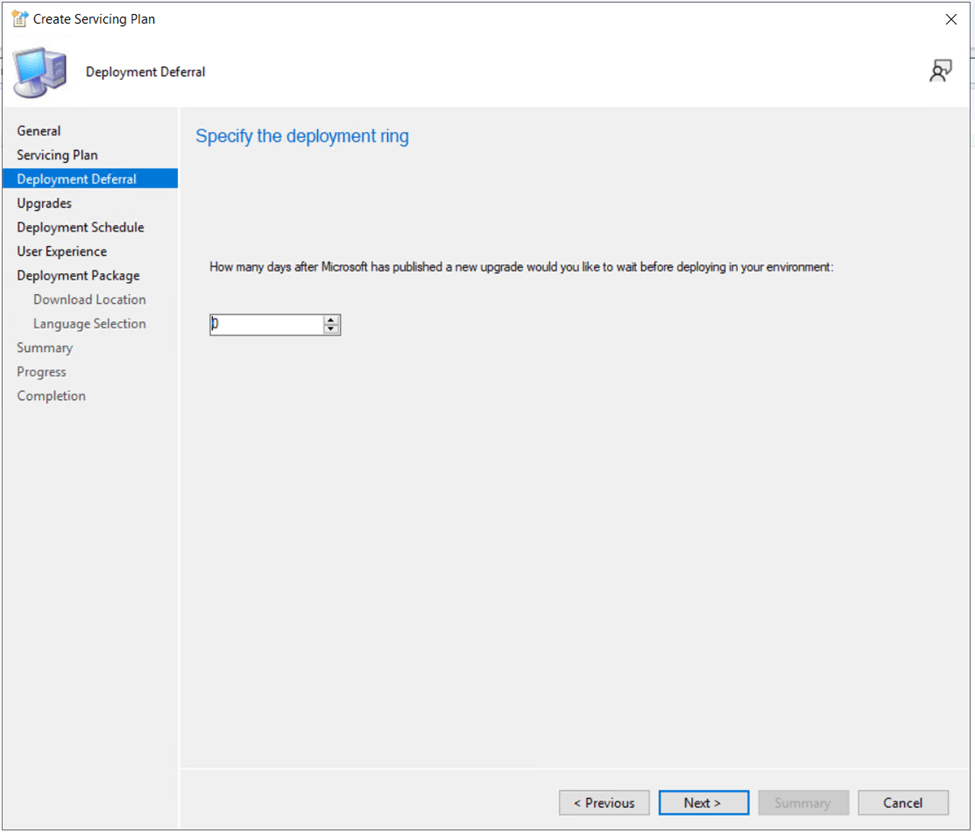
On the Deployment Deferral page, I am going to leave the deferral days at 0 as 23H2 came out over a year ago and I wish to immediately deploy it.
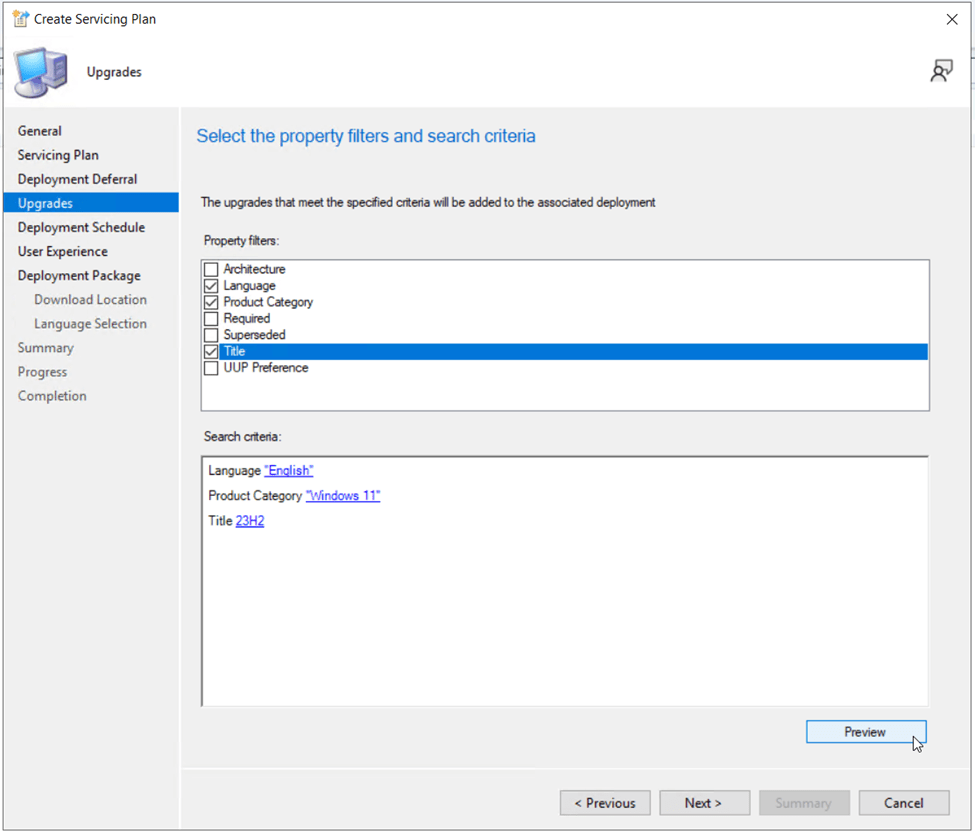
On the Upgrades page, specify the criteria to search for the Windows 11 23H2 update. I will use Language: English, Product Category: Windows 11 Title: 23H2. Click the Preview button to display the results.
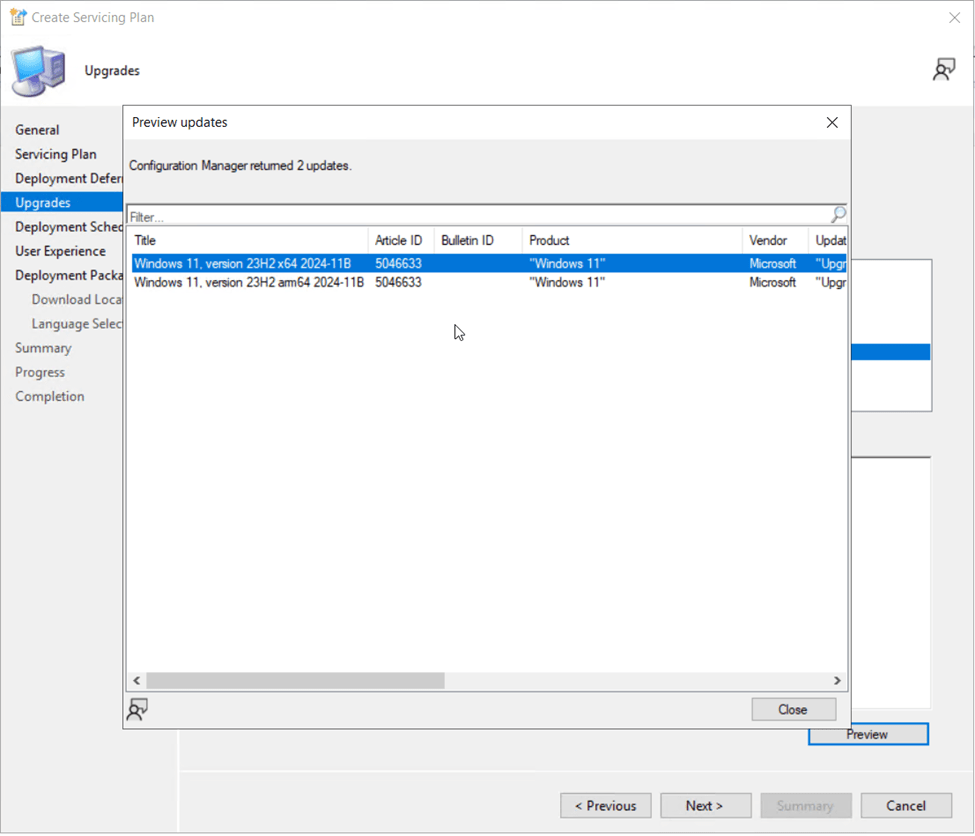
Now that I see there are two matching updates in my search results, I need to refine my search criteria so that I’m only deploying the x64 version of the update as I have no ARM based devices in my lab. I’ll copy the exact title of the update: “Windows 11, version 23H2 x64 2024-11B”, then close the preview window.
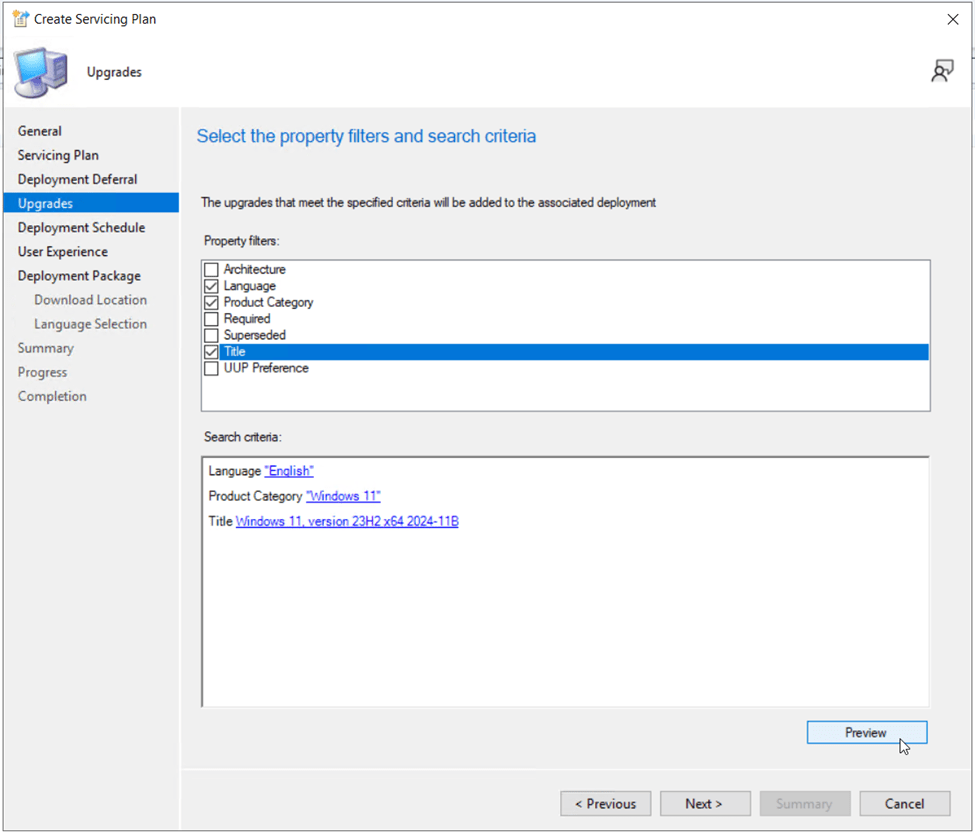
Back on the search criteria page, I’ll edit the Title field to Windows 11, version 23H2 x64 2024-11B then click Preview again.
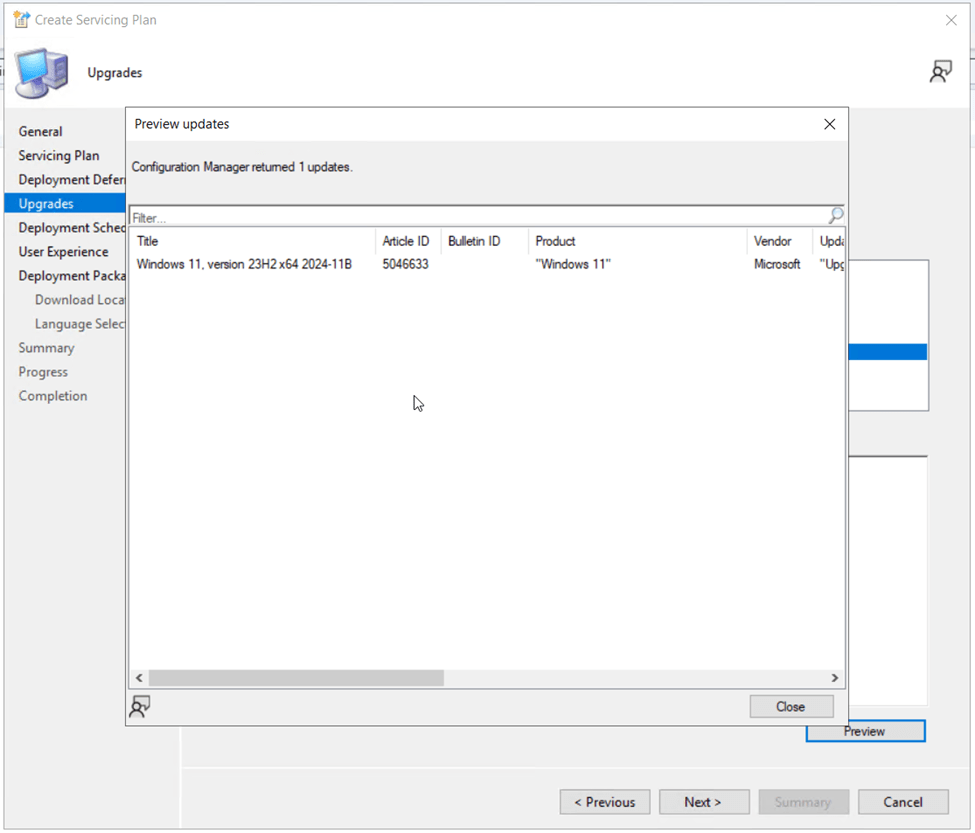
This time the results show only the x64 version of the update so I’m good to proceed to the next step. Click Close on the preview updates window.
Click Next to continue.
On the Deployment Schedule page, we need to set the time the update will be made available to client devices as well as a deadline when the update will automatically apply to the device. I’m leaving the software available time set to As soon as possible and changing the installation deadline to 3 months as I want users to be able to optionally self-service the update first before I enforce the upgrade 3 months from now.
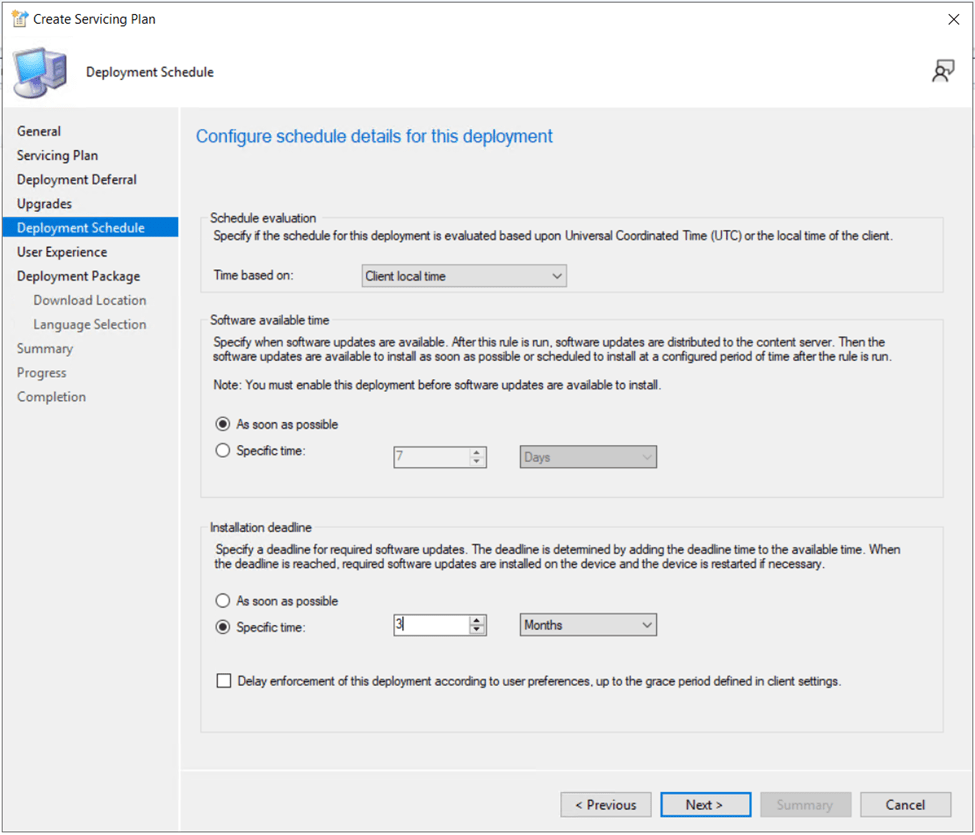
Click Next to continue.
On the User Experience page, change the user notifications to Display in Software Center and show all notifications. This allows the Windows 11 23H2 update to show up for the user in Software Center. Set the deadline behavior to allow Software Update Installation to occur outside of maintenance windows. This will ensure when the installation deadline arrives, the update won’t wait for the next maintenance window to apply. It is also a good idea to check the box for Workstations under “suppress the system restart” so devices are not automatically restarted when an installation deadline occurs.
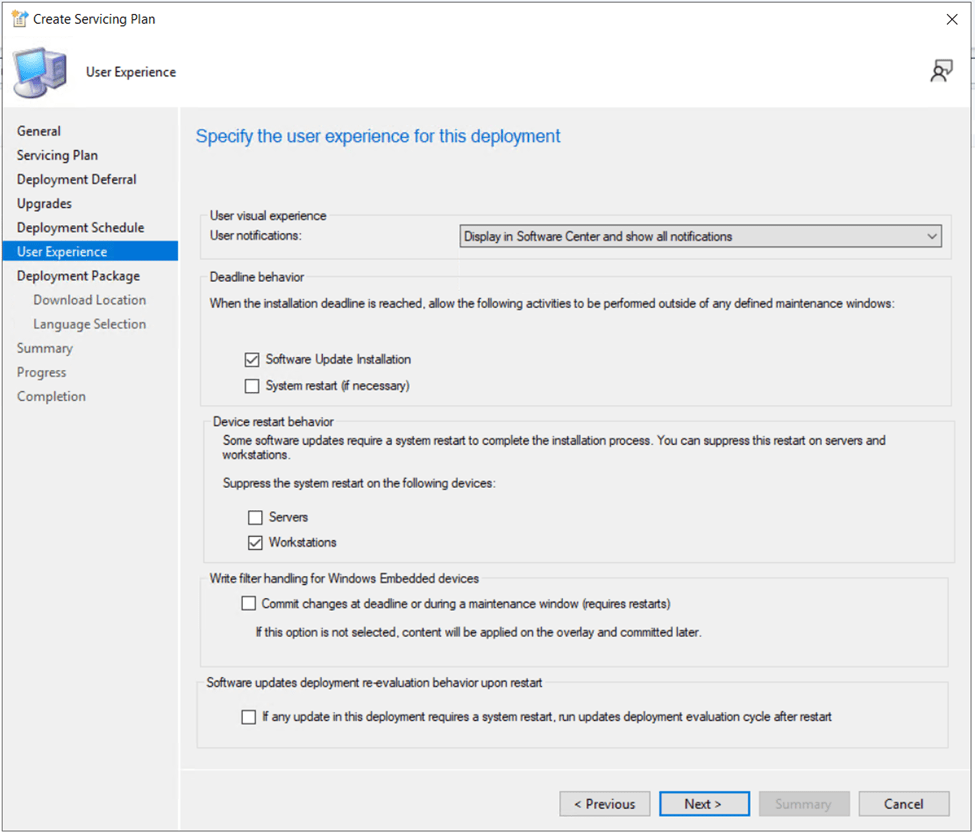
Click Next to continue.
On the Deployment Package page, choose the option to Create a new deployment package. Give the package an appropriate name, such as “Windows 11 23H2 Feature Update”, a Description, and specify the location of your network accessible software update package source files.
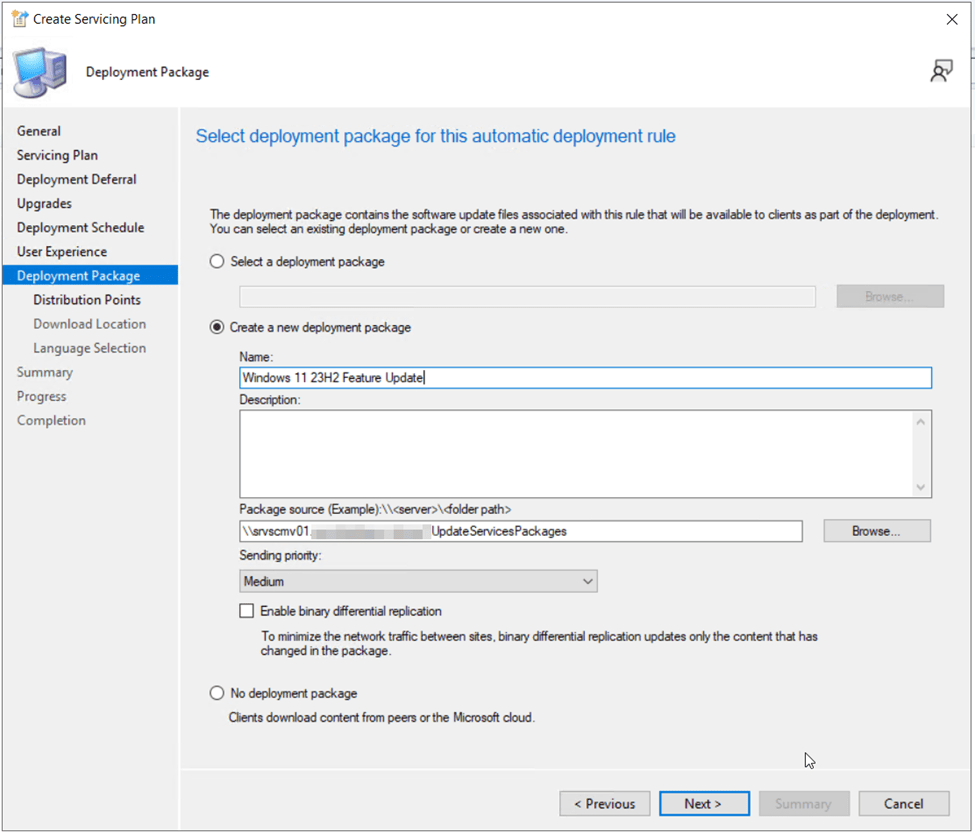
Click Next to continue.
On the Distribution Points selection page, click Add then specify which distribution points, distribution point groups and cloud management gateways (if applicable) the update will be stored on for distribution to clients.
NOTE: While it may sound like a good idea to place the Windows 11 feature update on your cloud management gateways so your clients can access the update regardless of their location, remember you are charged for bandwidth from the cloud management gateway to your clients. The distribution of large updates/applications to many devices can lead to more costly monthly charges to your Azure subscription so beware of the implications. A better architecture to deliver Windows 11 upgrades to remote clients would be via co-management with Intune (More on that in Part III…)
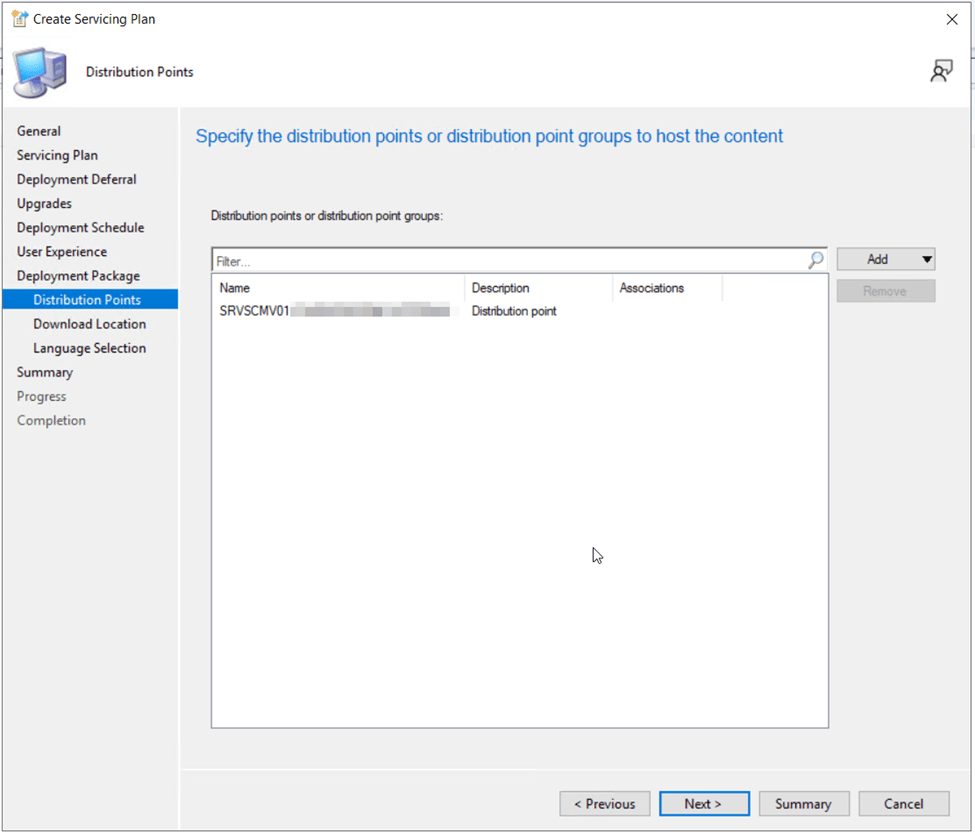
Click Next to continue.
On the Download Location page, leave Download software update from the Internet checked.
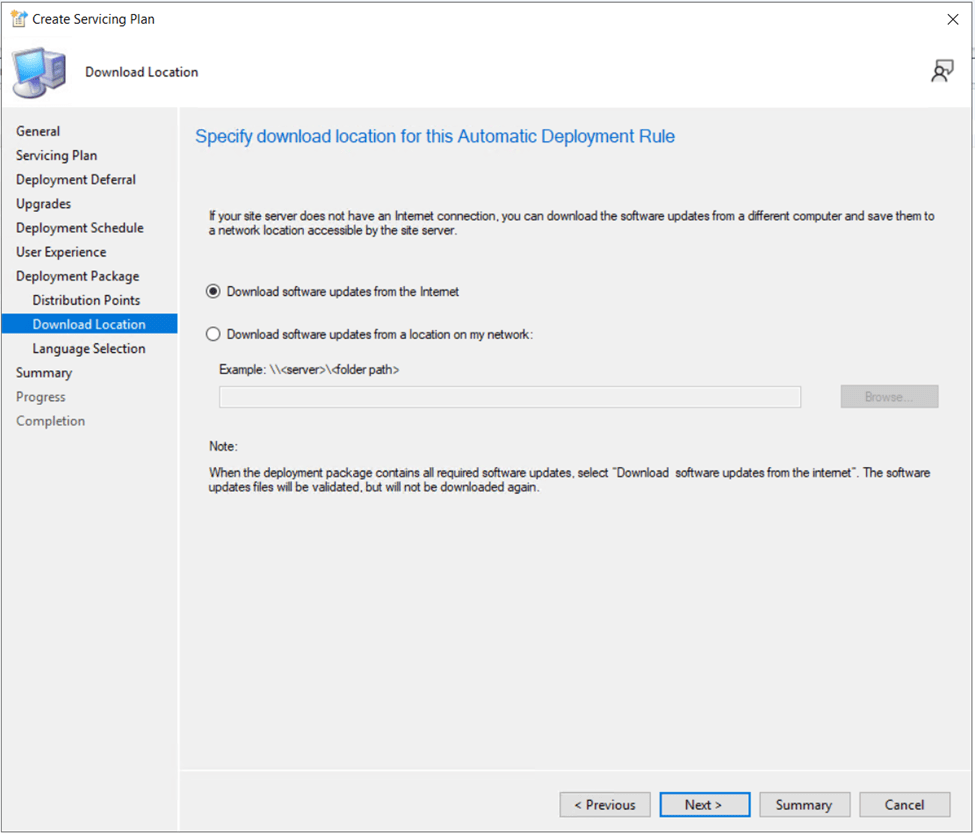
Click Next to continue.
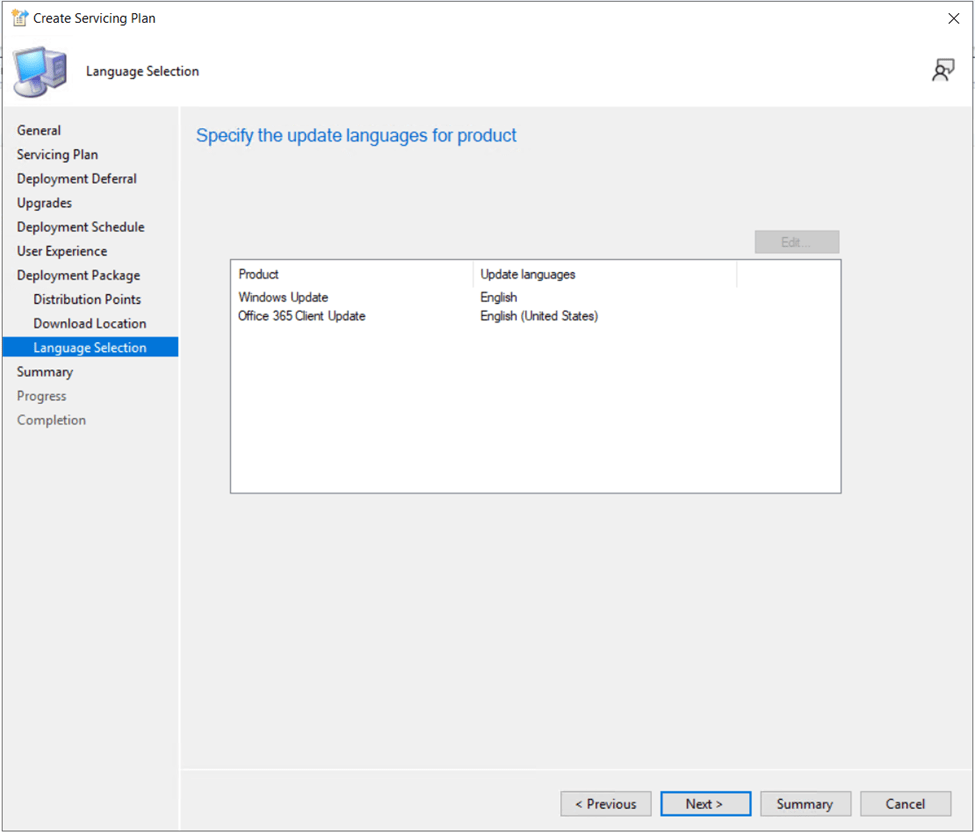
On the Select update languages for products page, leave the settings at their defaults or modify based on your locale. Click Next to proceed.
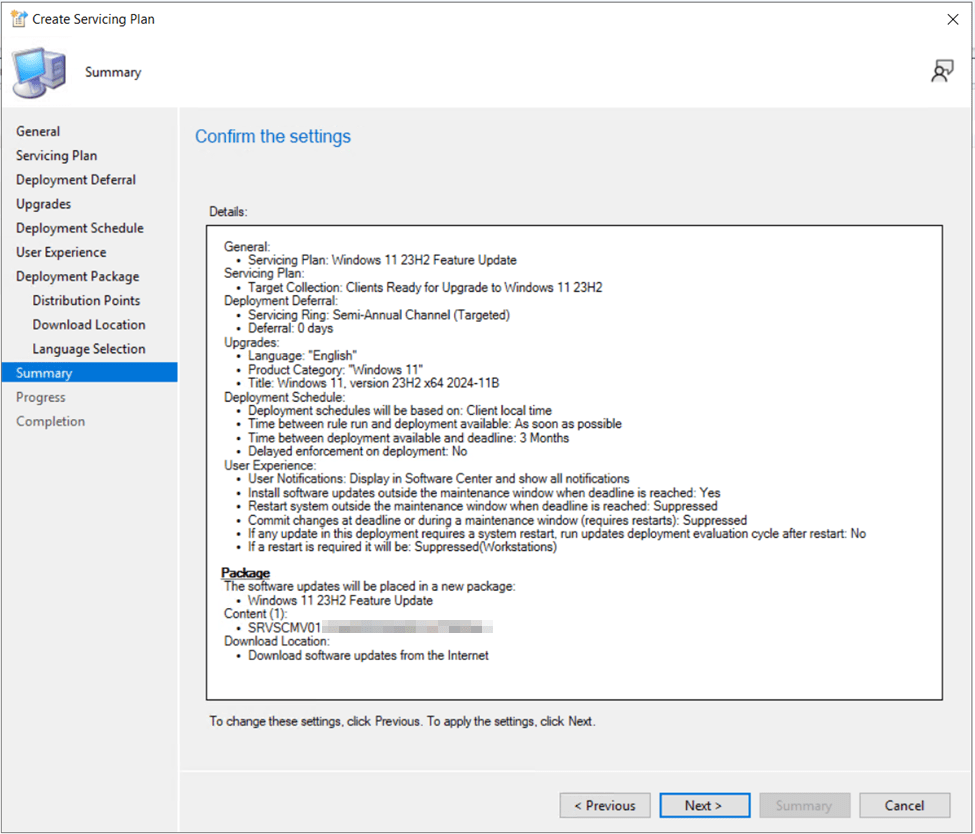
Verify all settings on the summary page, then click Next to commit the servicing plan deployment.
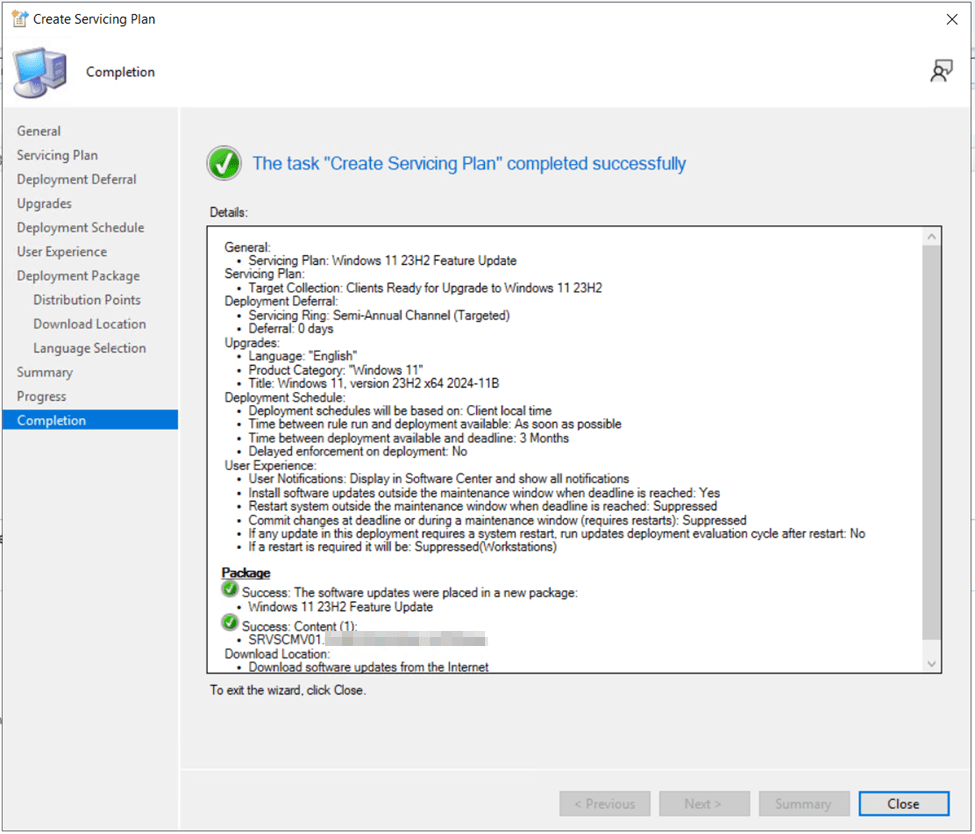
You can now monitor the deployment of the Windows 11 Update to users from the servicing plans page. Users should begin to see the Windows 11, version 23H2 x64 2024-11B update show up in Software Center on their devices under the Updates section, the next time the device checks in and retrieves the new deployment. This may take some time as the update needs to be downloaded, distributed to the distribution points and the client devices need to check in to receive their assignment.
User Experience from Deployment via Servicing Plans
From the Software Center application on the Windows 10 client devices…

Note: The upgrade from the screenshots was done on a physical Dell laptop and took approximately 2 hours from start to finish. This was considerably longer than the 35 minutes it took the task sequence method addressed in Part I of the series.
Continue to monitor the Windows 11 Upgrade Readiness dashboard and deployment success of the servicing plan. When the deadline you configured for the update arrives, users will be forced to apply the update although the restart will wait for user intervention.
Are you finding the content on my site particularly helpful? Please consider donating to help me offset the costs of maintaining this site. Your support is greatly appreciated!


Leave a comment